Welcome to the
Manage My Case Registration help. The information provided can help you:
- Assist in the creation of a new user account;
- Recover a forgotten username;
- Recover a forgotten password; or
- Log on to Manage My Case.
From the Missouri Courts page, the
Manage My Case (MMC) icon

will display along the header of the page.

Click on the
Manage My Case icon to launch
the log in/registration page.
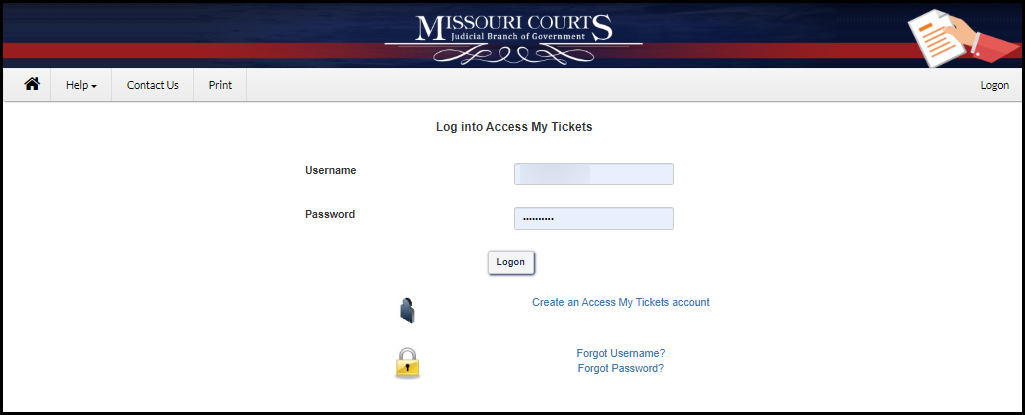
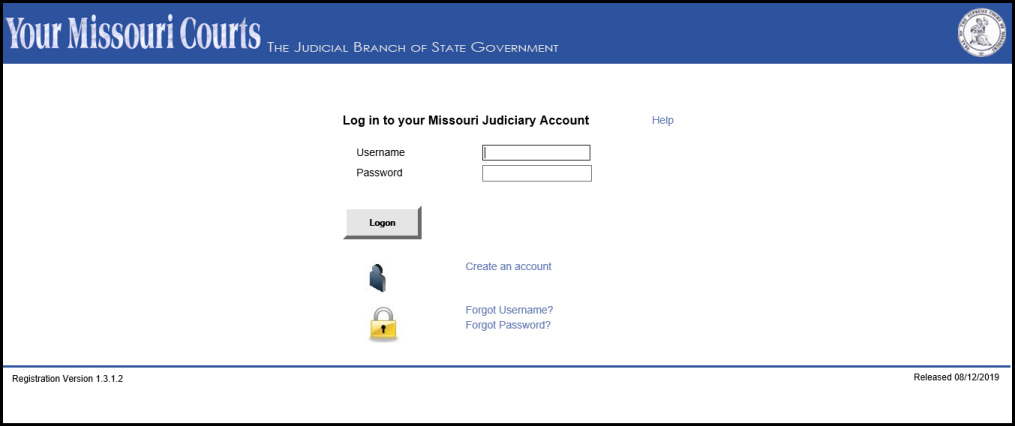
The log in page will display. At this point, enter
the username and password or click
Create a Manage My Case account.
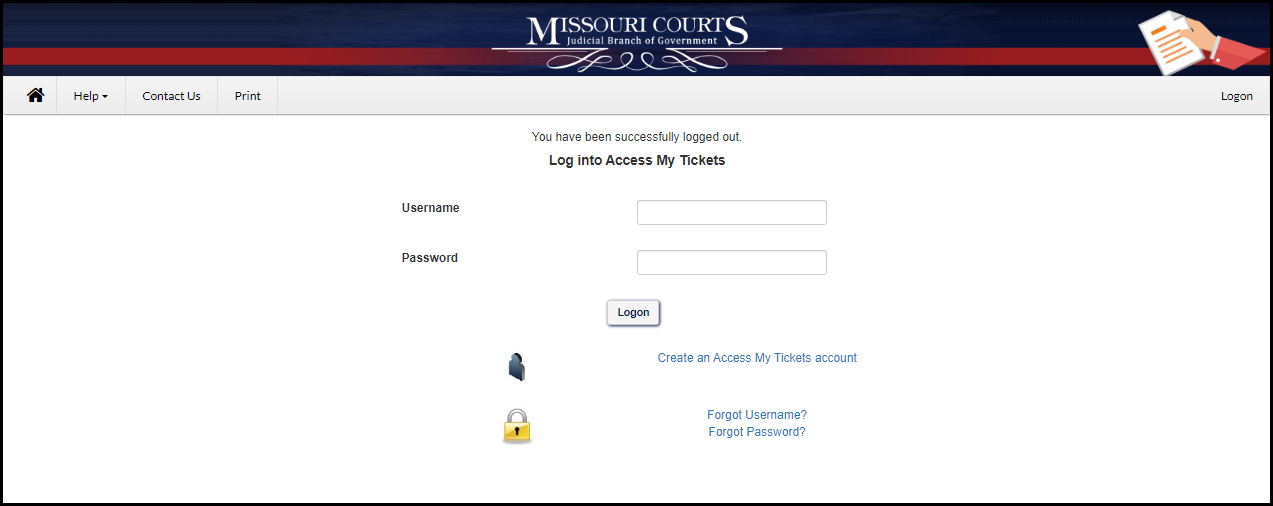
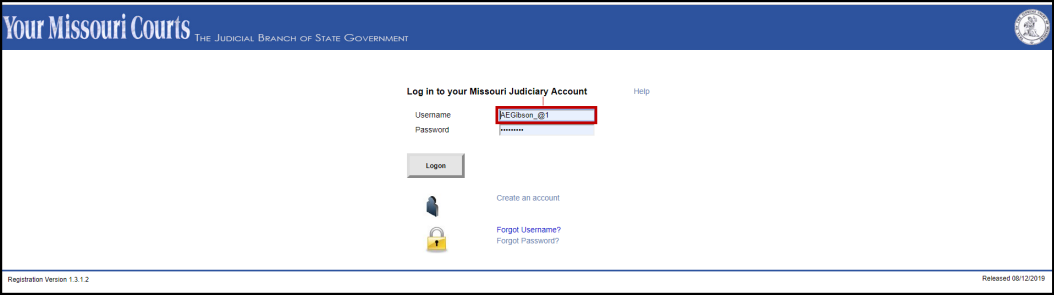
If an account already exists, enter the
Username
and
Password in the fields marked, then click the
Logon button. If the correct username and
password have been entered, the login process will open the
Manage My Case
home page.

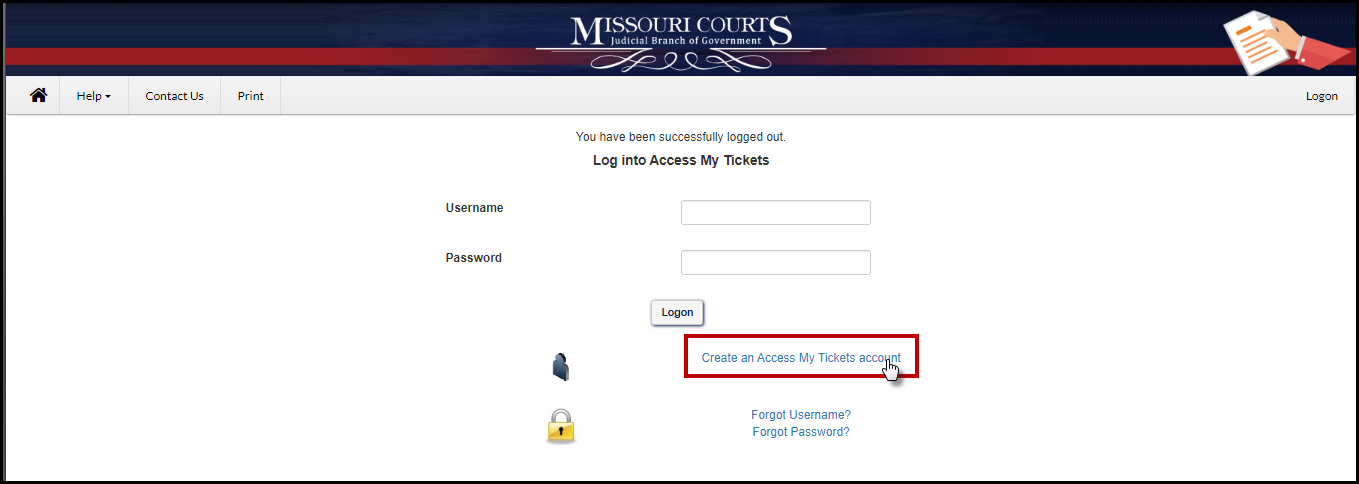
First time users will need to create an
account. Select
Create a Manage My Case account to
start creating an MMC account.
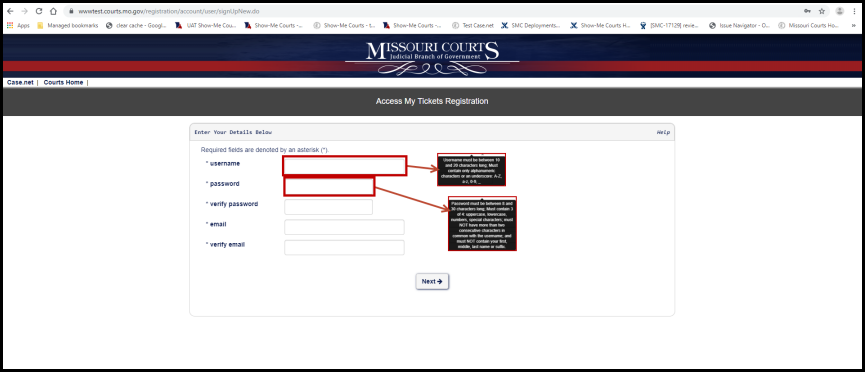
On the Enter Your Details
Below screen, enter a username, password and email address
(all fields are required).
Note:
- A Username must be between 10 and 20 characters long and contain
only alphanumeric characters or an underscore: A-Z, a-z, 0-9.
- A Password must be at least 8 characters long and contain at least 3 of
the following: uppercase, lowercase, numbers, or special characters.
- Must NOT have more than two
repeating characters in common with the username and cannot contain your first, middle, last name or suffix.
Note:
* indicates the field is required to proceed.
Select
Next to continue.
On the Personal Information screen, enter the appropriate information indicated.
Note:
* indicates the field is required to proceed.
Select Next
to continue to the next page.
Select
Back
to return to the previous page.

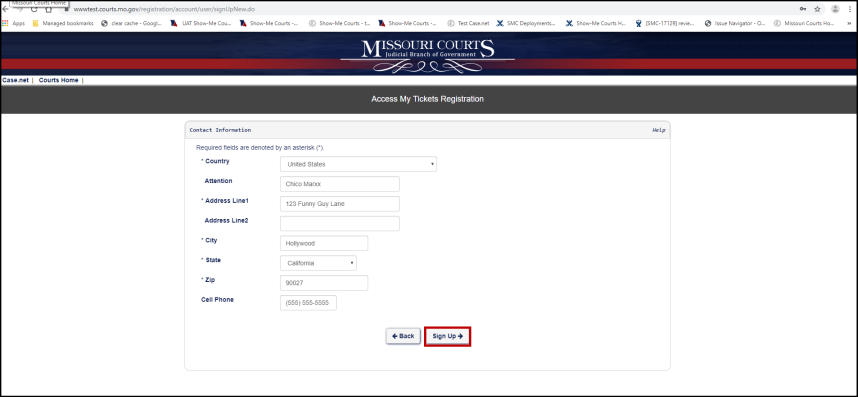
On the Contact Information screen, enter the appropriate information indicated.
Note:
* indicates the field is required to proceed.
Select
Sign
Up to continue to the next page.
Select
Back
to return to the previous page.
Note:
If the address provided is not a private residence, the Attention line can be
used to direct any correspondence to the appropriate party.
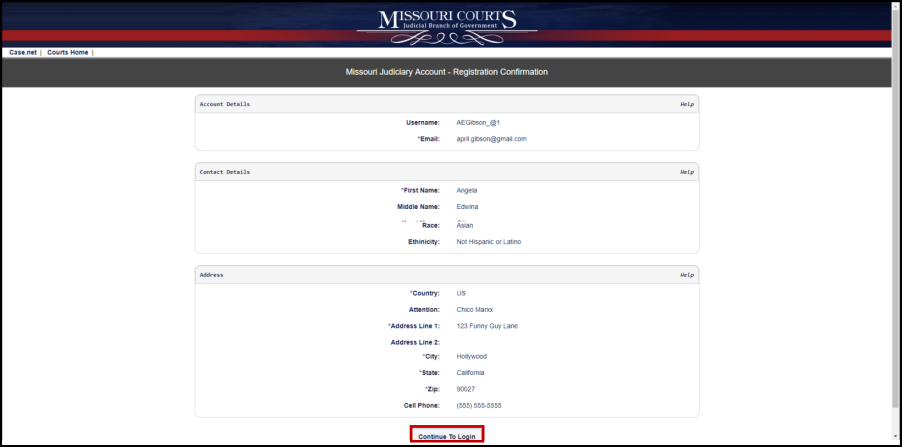
When
Sign Up is clicked, a review page will
display providing an opportunity to review the information provided.
Select
Continue To Login.
Log in to new account.
The
Manage My Case page will open.
An email will be sent to the address provided in
the
Personal Information section with steps to complete
to finalize your registration.
To update account information, click the
My
Account link on the Manage My Case Home page.
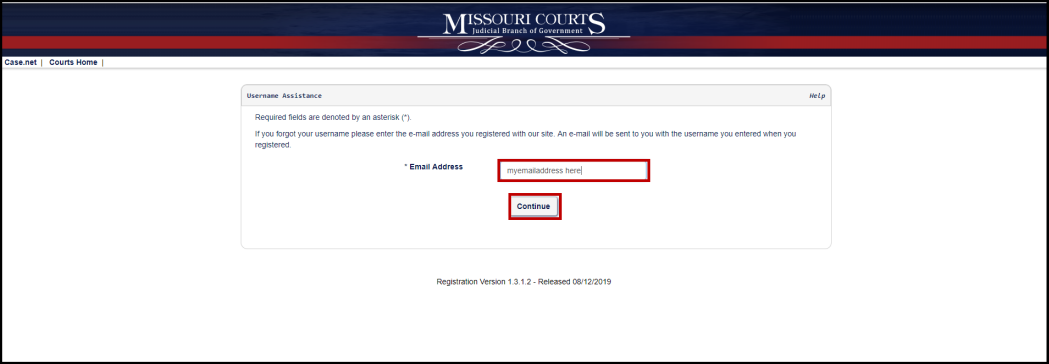
Recover Username
Select Forgot
Username? to begin the process to recover a forgotten username.
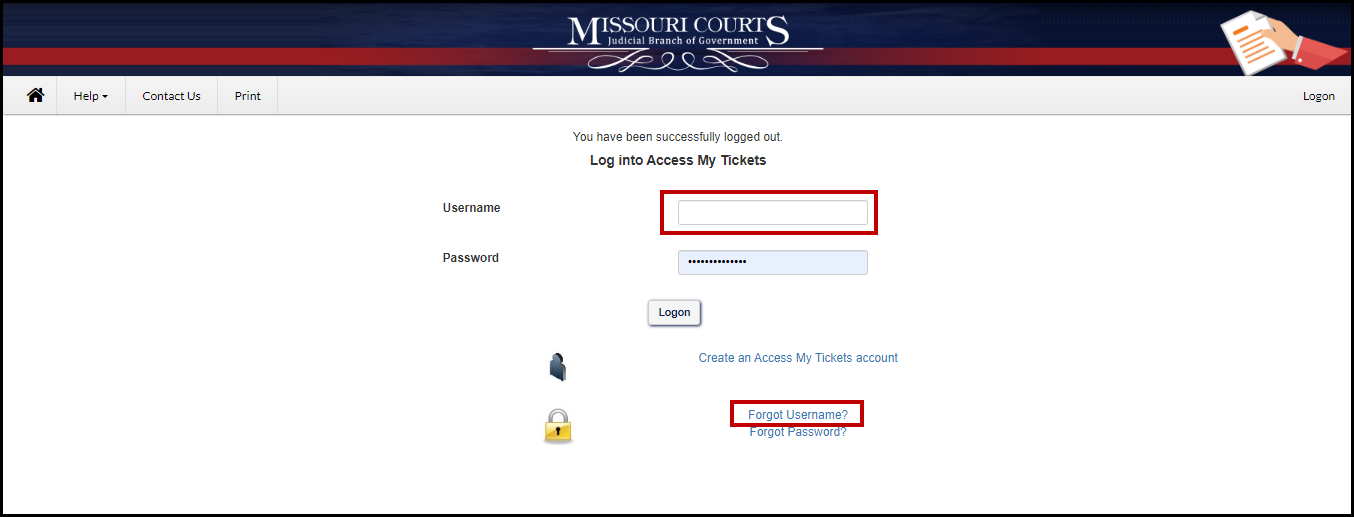
Enter the email address associated with the Username.
Click
Continue to confirm and look up the
username.
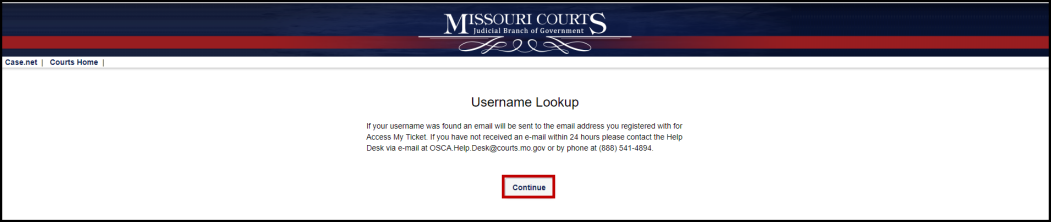
Review the information then click
Continue under
Username Lookup.
An email will be sent to the email address
provided. Follow the directions in the
email to recover the username. Click the
My
Access link in the email to return to the log in page.
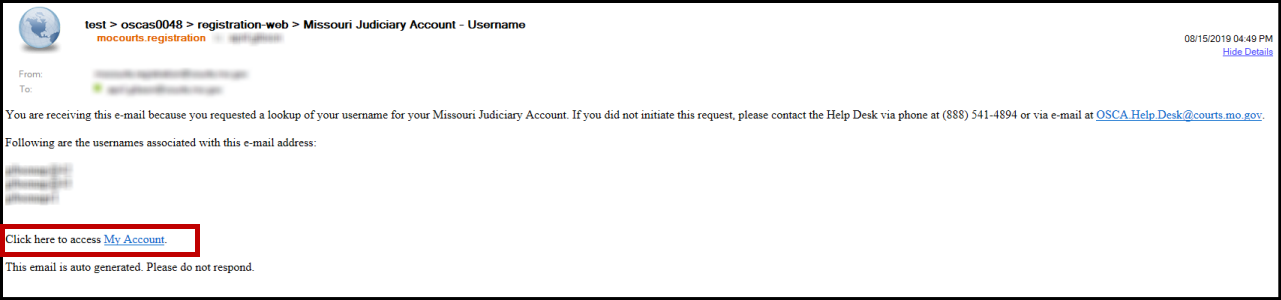
Complete the log in process as described in the
Manage My Case Log in/Registration
help.
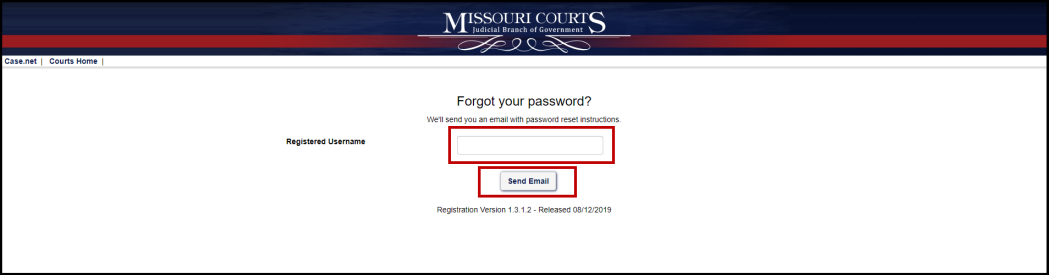
Recover Password
Select
Forgot
Password? to begin the process to recover a forgotten password.

Enter the username associated with the password.
Select
Send
Email to send an email with the username information.
Click
Continue.
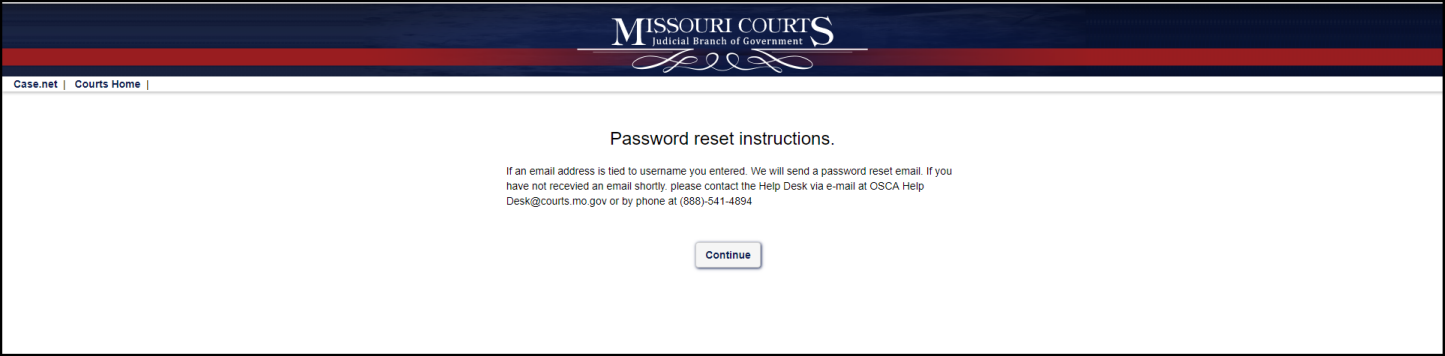
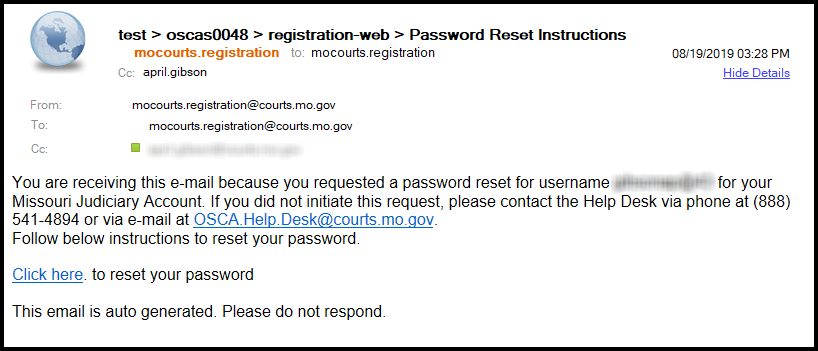
An email will be sent to the email address
provided. Follow the directions in the
email to reset the password. Click the
Click
here link in the email to reset the password.
Enter the new password in the
Password and
Verify Password fields.
Click Update to update the password information.
Complete the log in process as described in the
Manage My Case Log in/Registration
help.
Back to Top
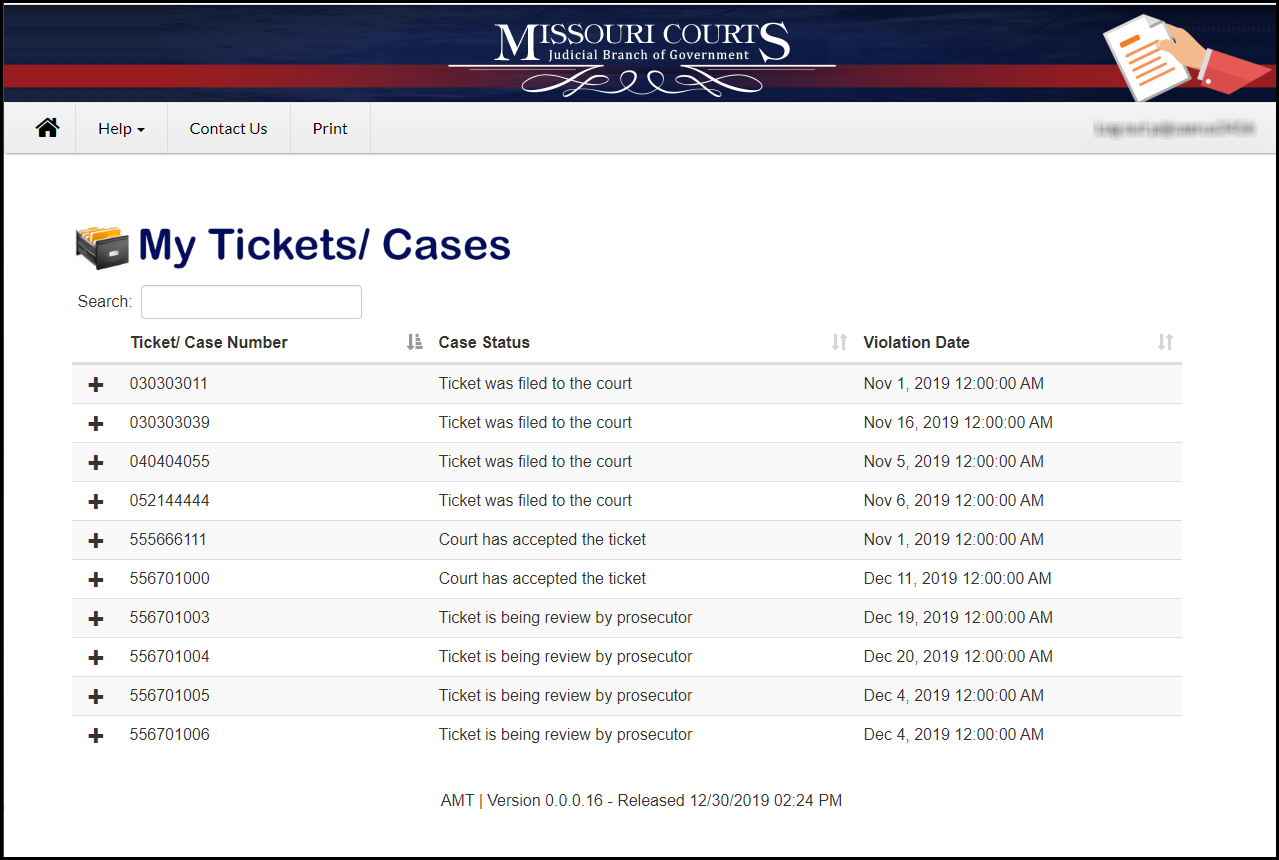
The
My Tickets/Cases section displays any tickets/cases claimed.
Click the My Tickets/Cases icon to open and view any tickets/cases.
A search feature provides a way to search for a specific ticket/case associated to the user. The Search feature uses smart search functionality and begins searching for the numbers entered as the user types in the ticket number. When the searched case is found, it displays below the search window.
Welcome to the
My Messages help information for
Manage My Case. You must have added a case(s) using
Add a Case To My Account before you can proceed.
Click the My Messages icon on the Manage My Case home page.
Note: New pending messages will display above the My Messages icon.
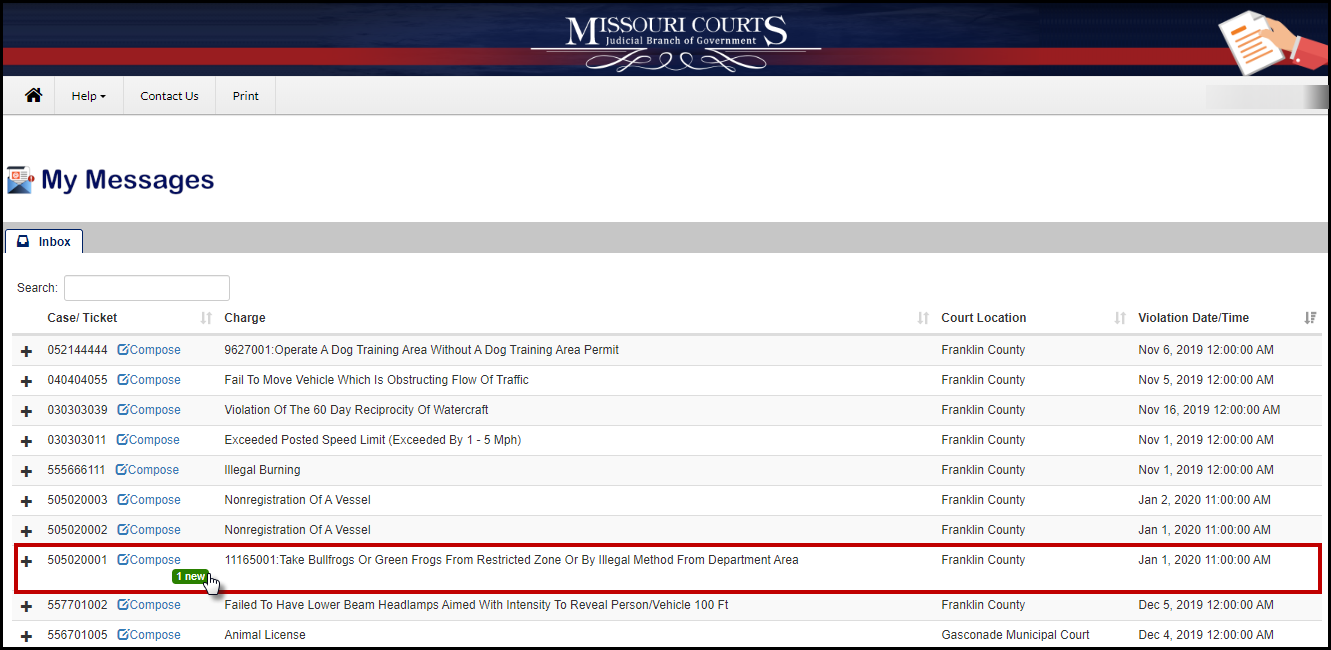
The My Messages inbox will open and display any cases that have had correspondence associated to them.
Any new message icon

will display within the Case/Ticket section.
Click the + next to the Case/Ticket number to open messages for the selected case.
New messages will have the

indicator in the top right corner of the message.
Any unread messages will indicate the message has not been read in the Read By field.
Messages that have been read will no longer read as Not Read By.
Select the reply

button to respond to the new message.
Follow the process for requesting and responding to messages as described in the Add A Case To My Account process.
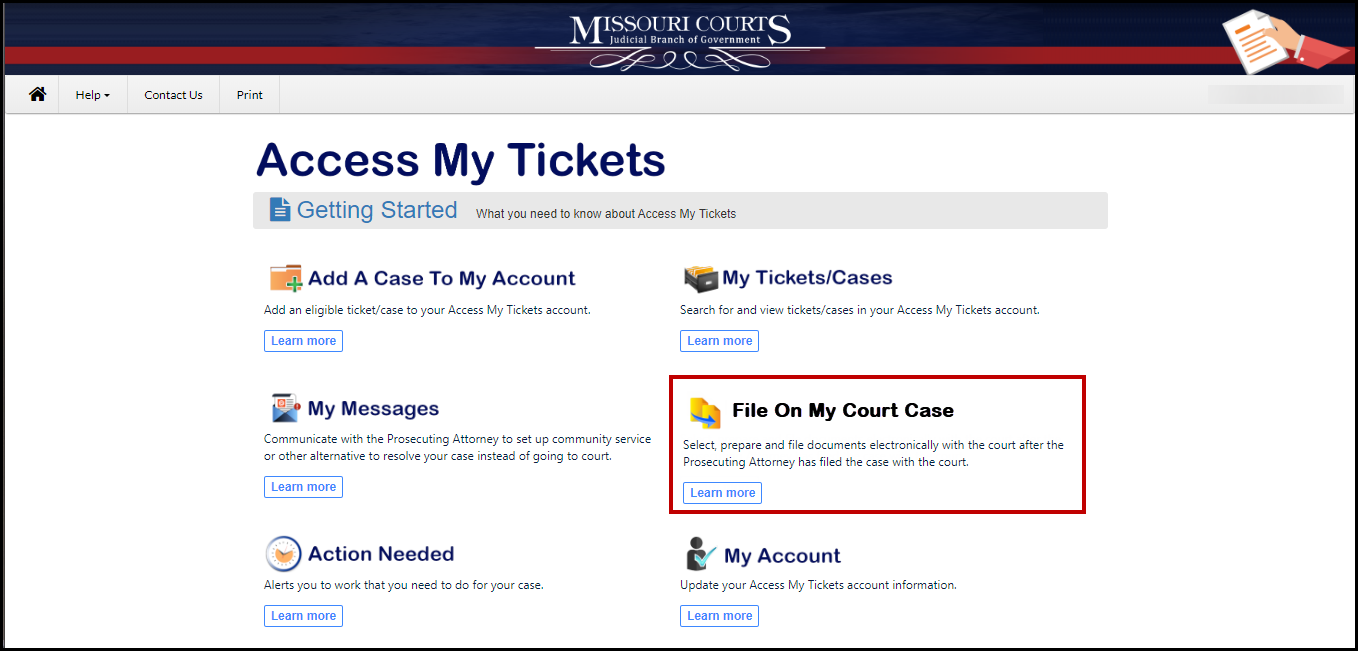
Welcome to the File
On My Court Case section of Manage My Case. File On My Court Case allows an individual
to file documents on a case that has been filed to the court by the Prosecuting
Attorney. Before a case is visible in this section the case has to have been
claimed in the Add A Case To My Account
section.
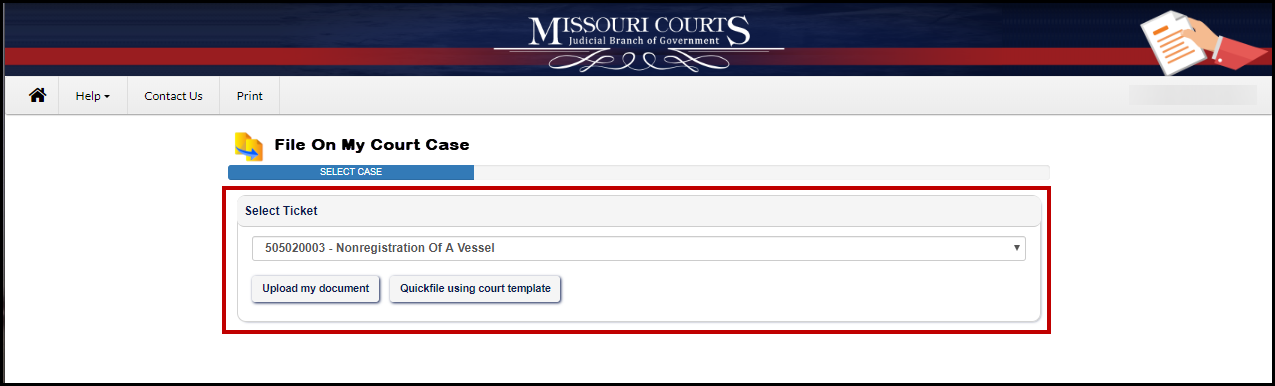
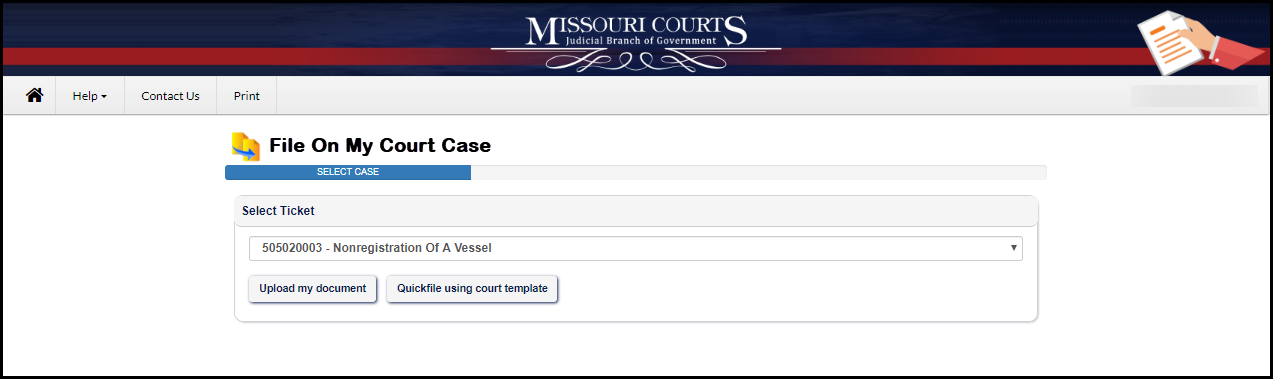
Select the case in the
Select
Ticket dropdown.

Select either the
Upload
my Document or
Quickfile using court template options to
continue.
Upload my Document
Selecting the
Upload
my Document will open displaying a summary of the
Case and
Party and in
the
Document Type dropdown the type
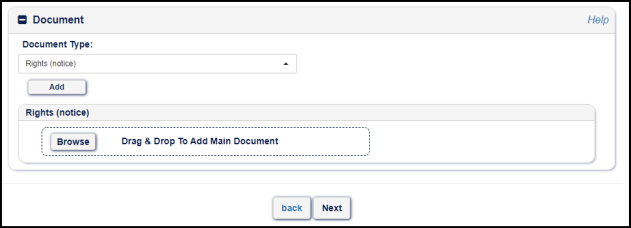
of document to be uploaded can be selected. After the
Document Type is selected click
Add to launch the
Browse or
Drag & Drop options (this view will be different if this process is
completed on a mobile device.
The initial view is the same for the personal computer or
the mobile device.
PC and Mobile view
Once the Add
button is clicked the view will change.
The personal computer view will launch the local documents
folder and the document can be selected by browsing to the file location and
double clicking the file or select and open to add the document.
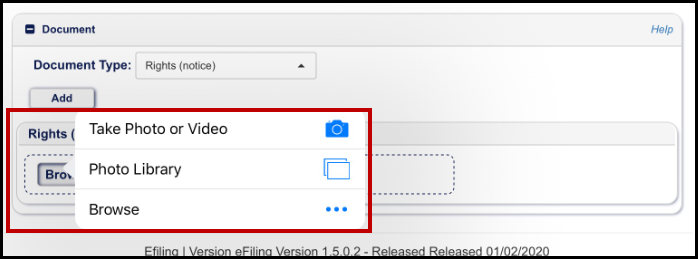
If using a mobile device,
when browse is selected the options to Take
Photo or Video, Photo Library or Browse are available.
- Take Photo or Video will allow the taking of a snap shot or video
of the document to be saved and added.
- Photo Library opens photos that have been recently taken and an
option of My Albums is available to look at other items to add.
- Browse is available if the document is stored on the mobile device
in .doc or .pdf format.
Mobile
view
PC
and Mobile view
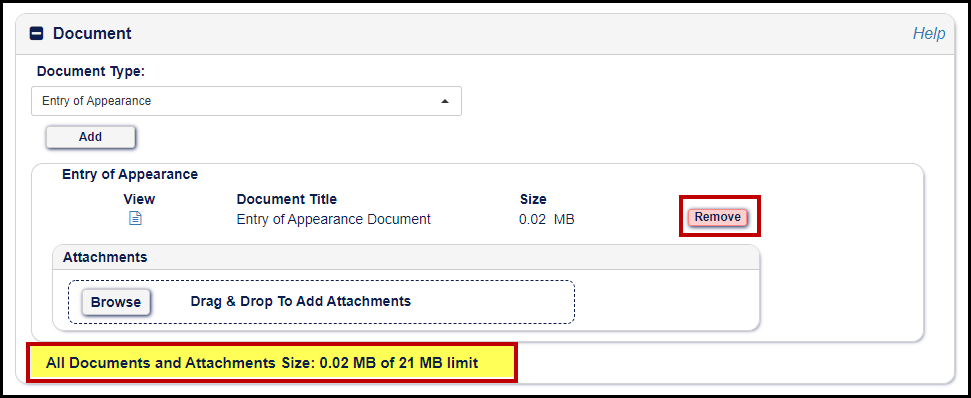
Both the PC and mobile device view display the document at the bottom of the section and
have the option to
Remove the
document and allow for another document to be added.
Select
Next to
continue or
Back to return to the
previous page.
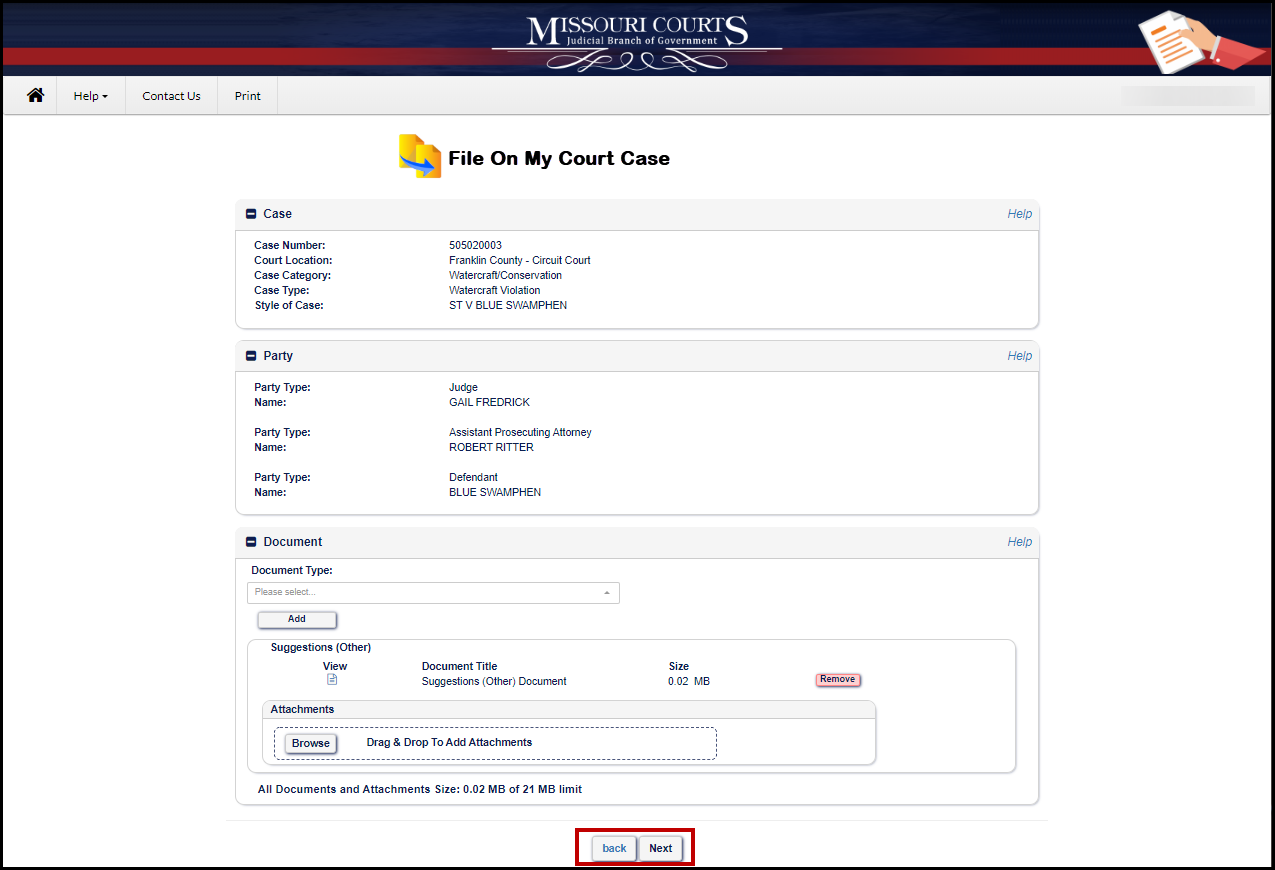
Next opens the
summary page for the information being added to the selected
Court Case.
Review the
information in the
Case,
Party and
Document sections.
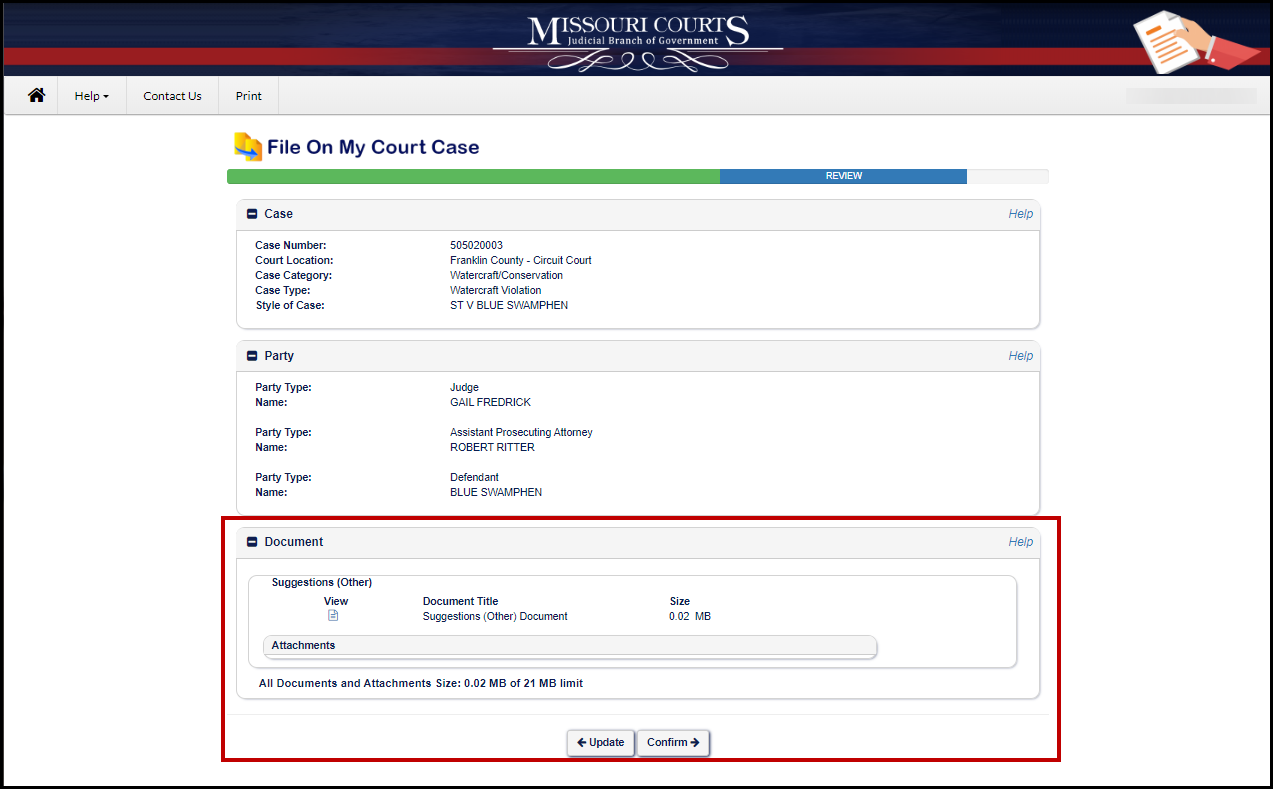
Select
Confirm to
add the document and document type to the existing court case.
A Confirmation page will display.
This page provides specific information about the information
submitted.
- The date and time it was submitted,
- That an email will be sent from the Missouri eFiling
System,
- The confirmation number,
- Case Information,
- Document Information; and
- Party Information.
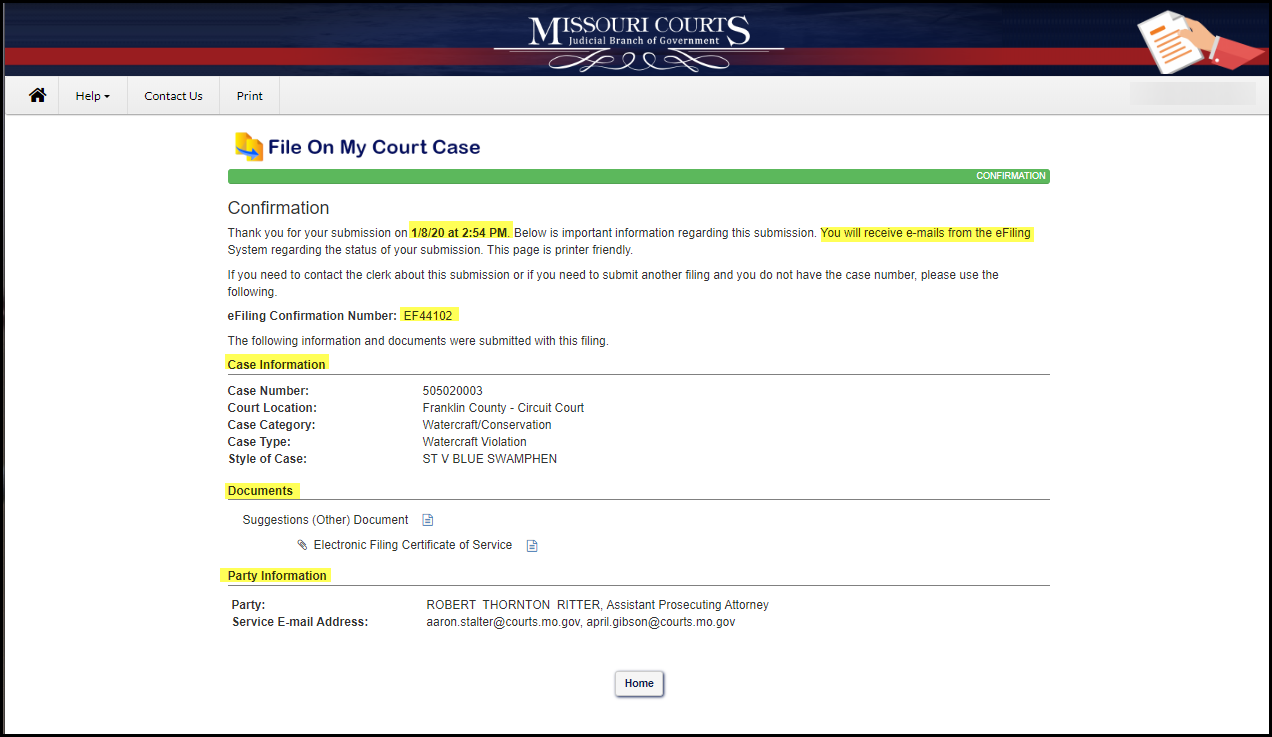
Select
Home to return to the Manage My Case home page.
Quickfile
When
Quickfile using
court template is selected, the document template selected will vary.
Note: Read each document carefully and
fill in or complete all necessary information.
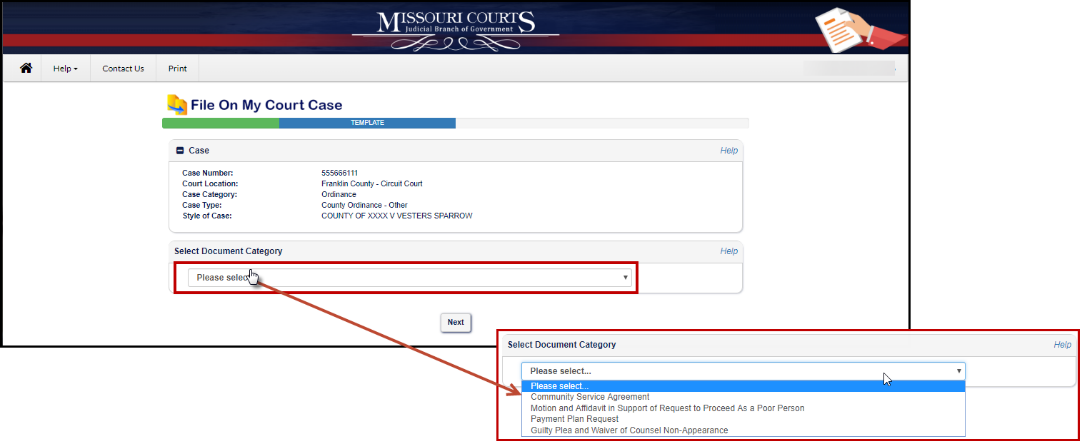
When the template has been selected click next.
Carefully
read
the document
before you sign.
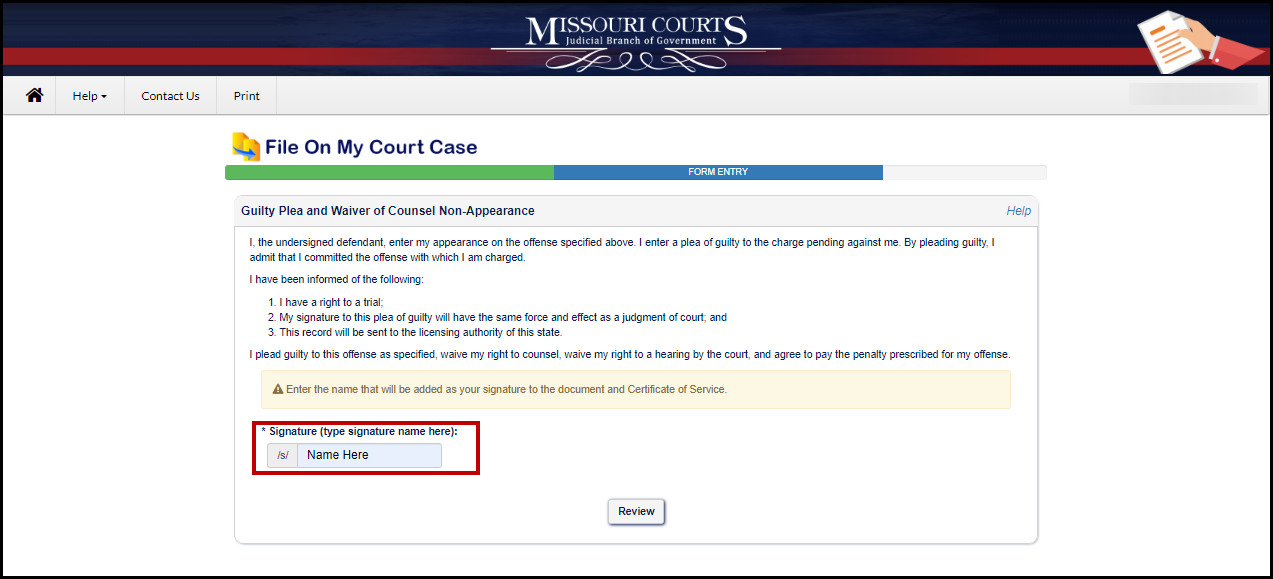
Enter your name in the signature field indicated. Your
signature will appear electronically on the document and include /s/ (example:
/s/ Jane Doe).
Note: /s/
next to the signature indicates that the signature has been electronically
attached.
Review each section:
Case,
Party and
Document.
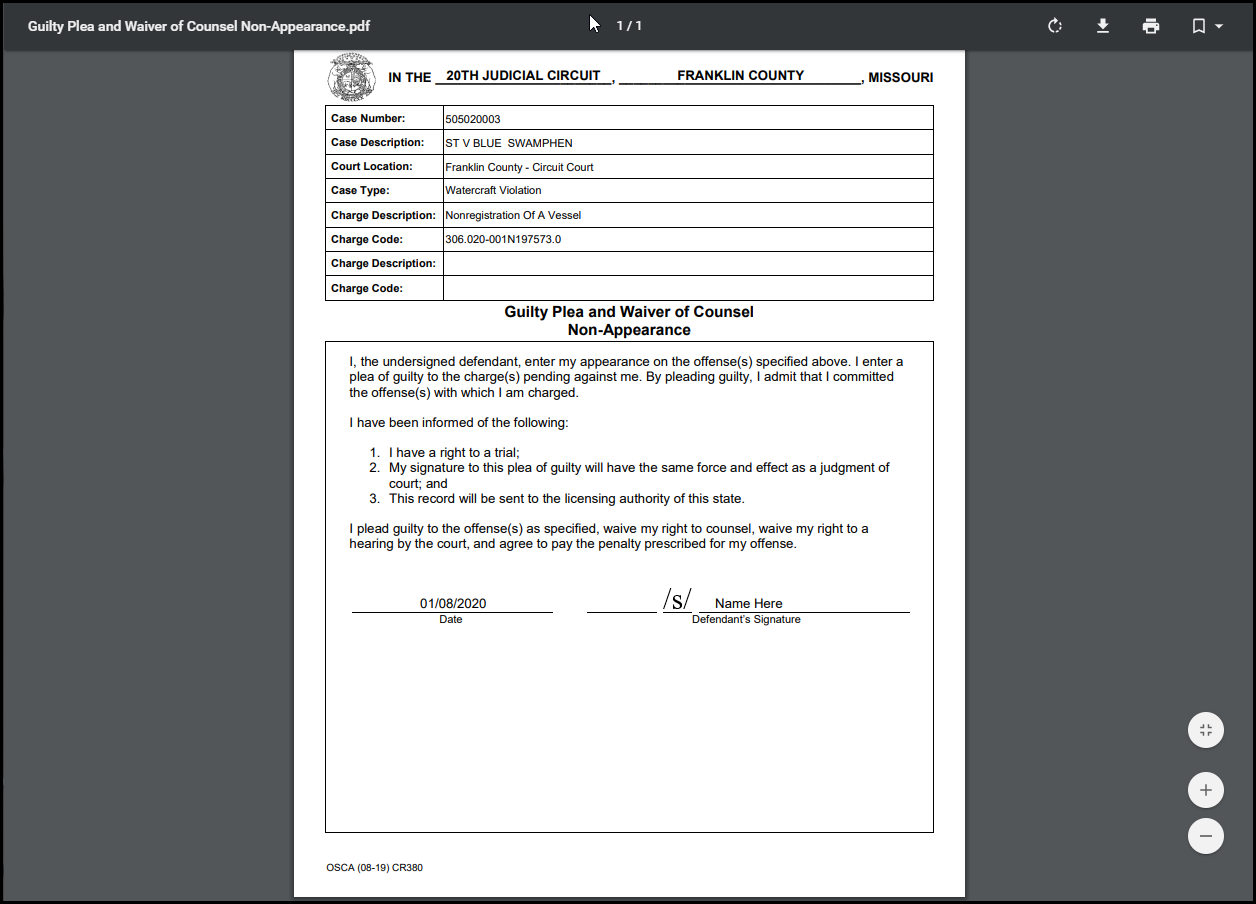
To review the signed document, click the document icon under
View.

When the icon is clicked the document
opens for review in a separate window. To update the document close the window
in which the document is displayed.
The view will go back to the Review window. To make any
updates select the Update button at
the bottom of the page. If no updates are needed, select Confirm.
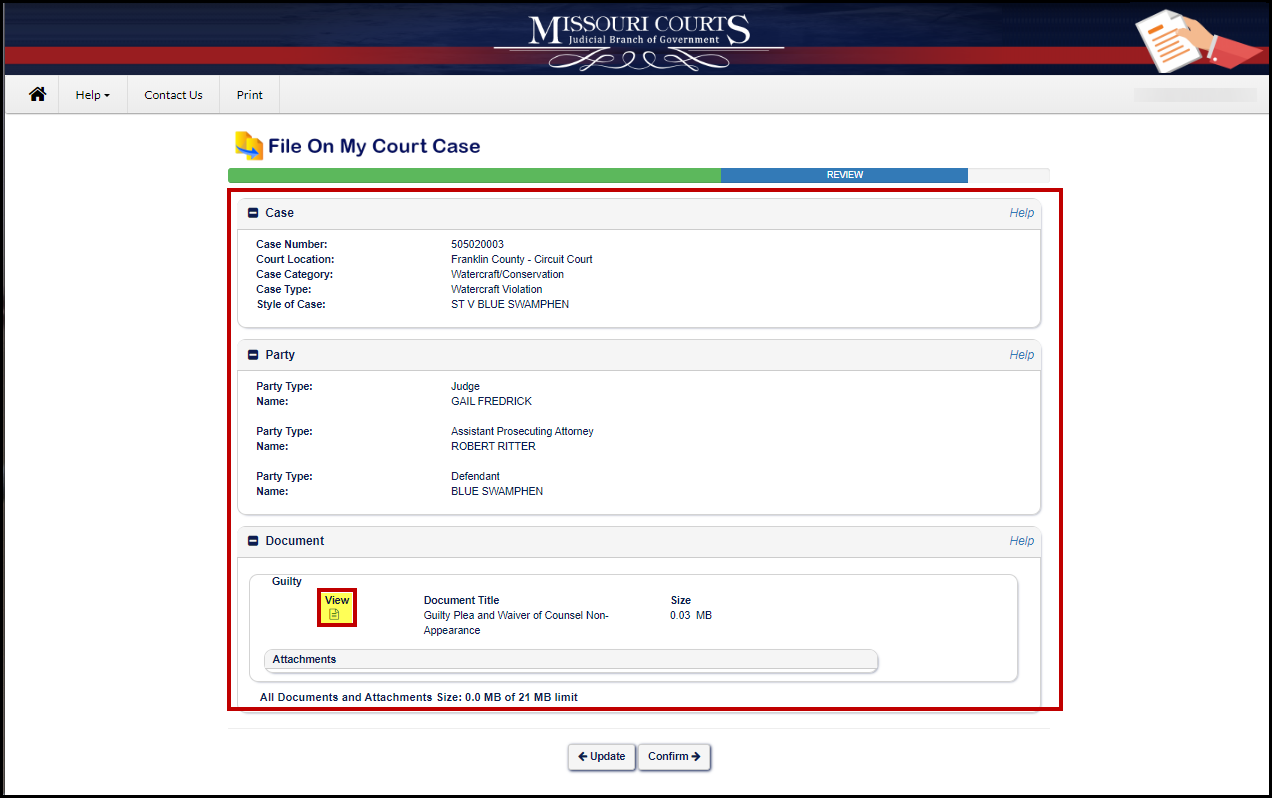
Click
Confirm to
submit the Quickfile template.

A
Confirmation
page will display.
This page provides specific information about the information
submitted.
- The date and time it was submitted,
- That an email will be sent from the Missouri eFiling
System,
- The confirmation number,
- Case Information,
- Document information; and
- Party Information.
Select
Home to return to the Manage My Case home page.
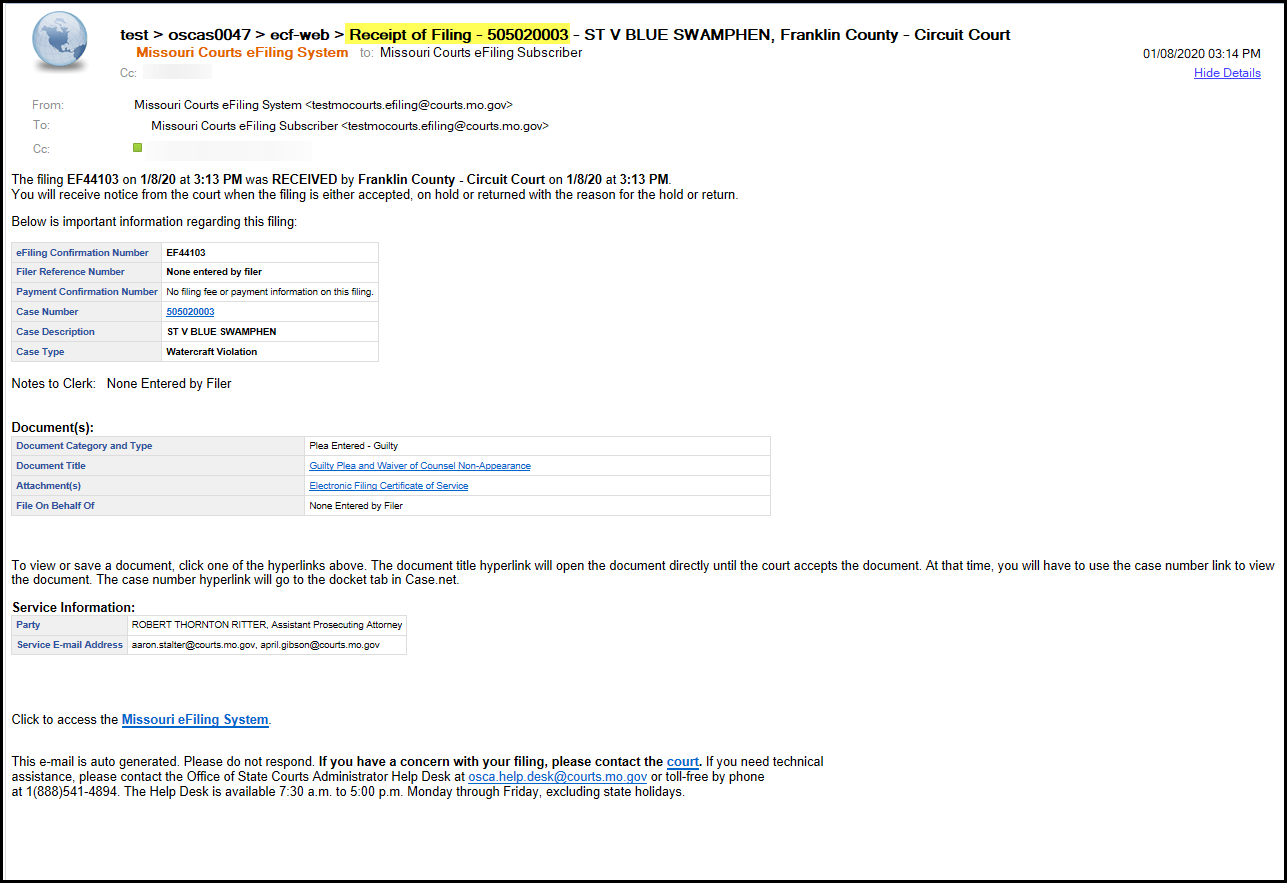
Email Messages
An email message will be sent to the email address provided
to confirm that the court has received the document. The message will include
the case id and be titled Receipt of Filing and will the filing confirmation
number, date and time it was received.
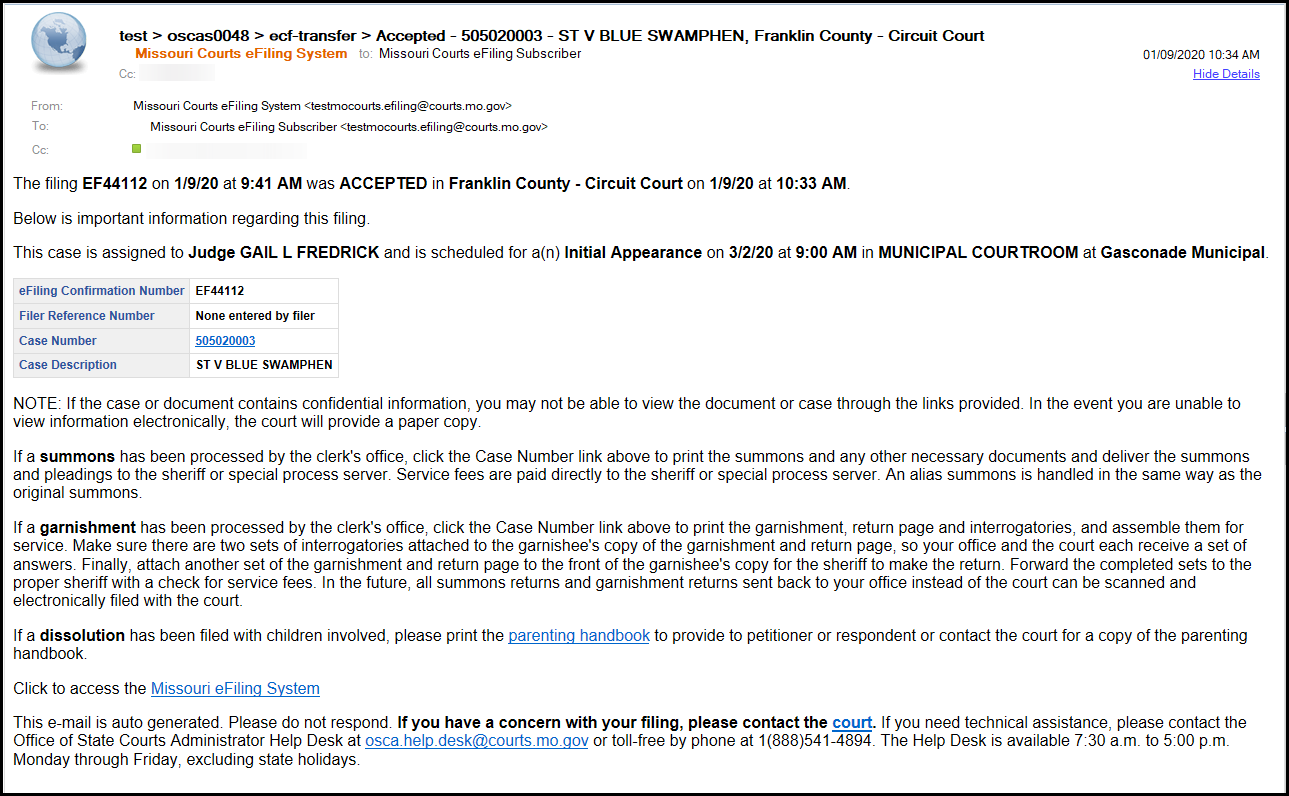
When the document that has been filed and the court has
accepted the document filed a message will be sent by email. This message will
be titled Accepted and include the case ID.
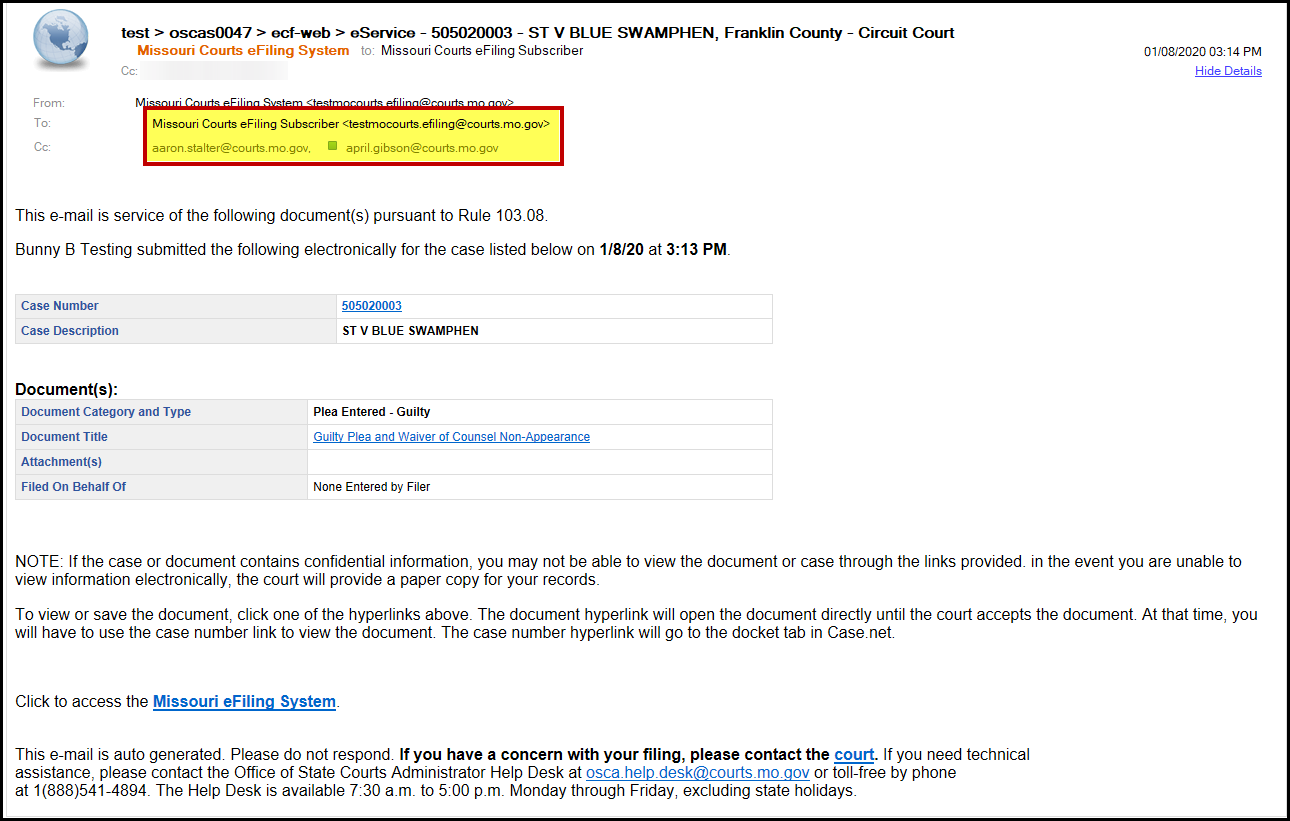
When a document that is filed using either the Quickfiler or the Upload my Document method and service is required, a confirmation
message will be sent by email to the recipient and a copy will be sent to the
sender.
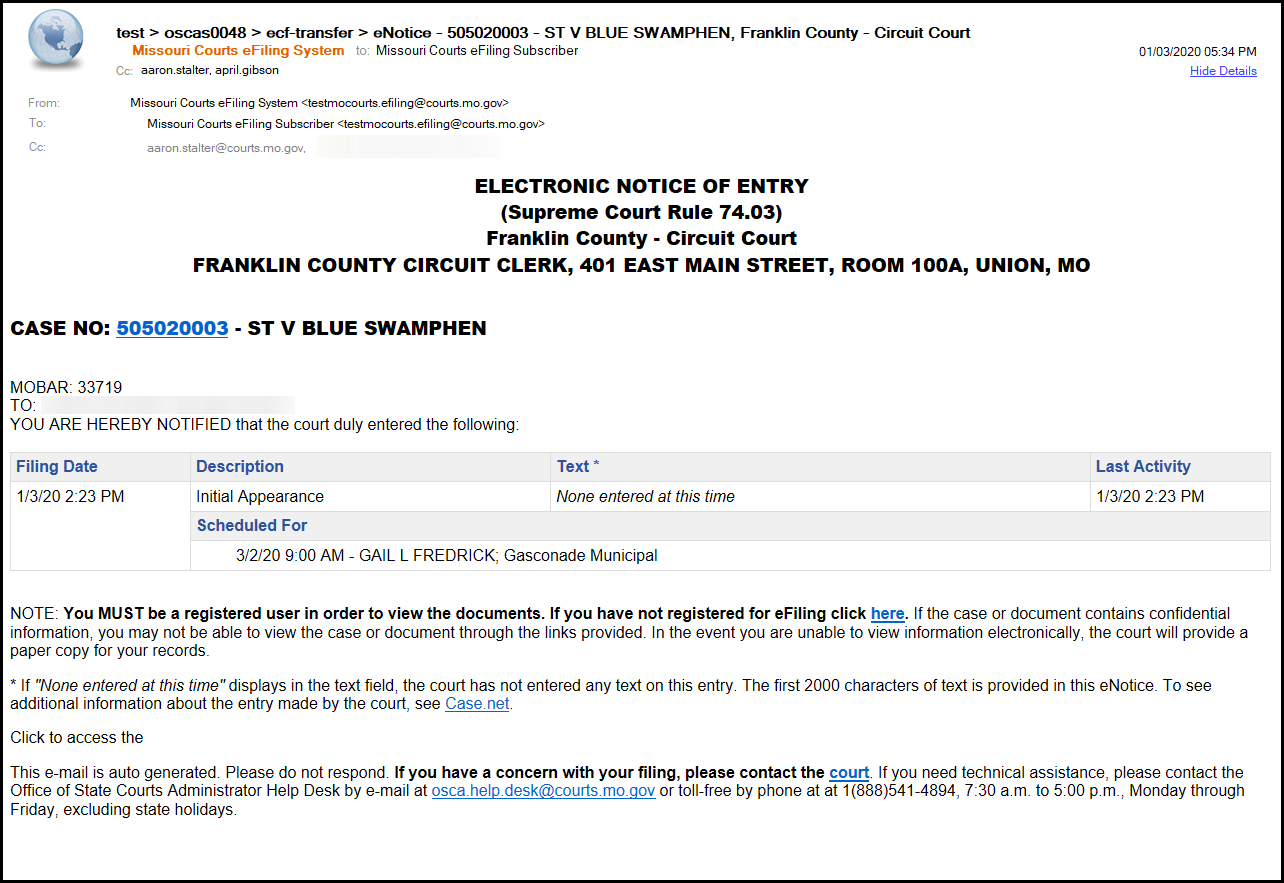
When activity has occurred on
the case an email message will be sent notifying those identified as parties on
the case that an activity has occurred.
This message will be identified as an Electronic Notice.
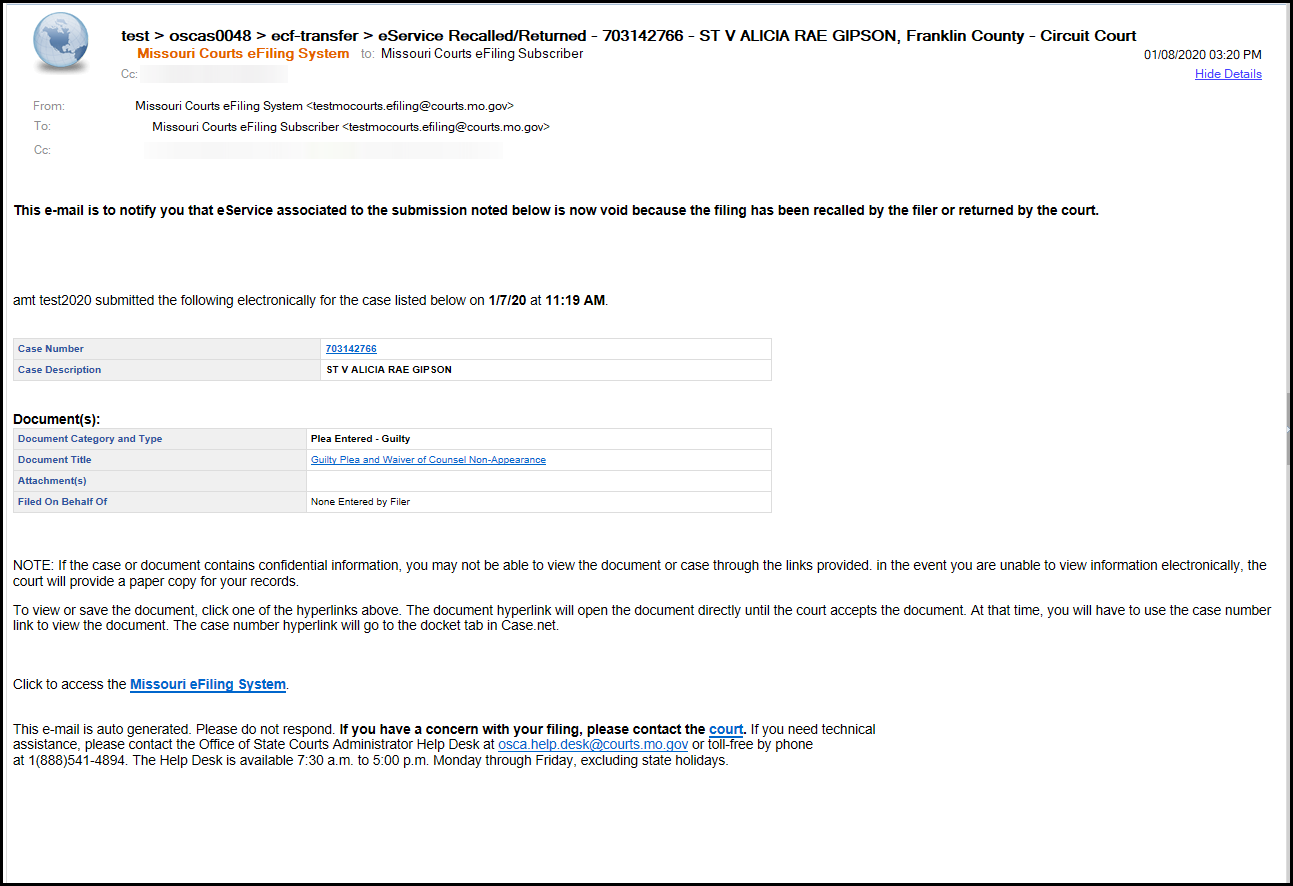
When a document has been filed using the Quickfiler or the
Upload my Document process and the court determines that there is an issue with
the document it will be returned to the filer. This message will be titled
eService Recalled/Returned.
Welcome to the Manage My Case help information for
Add A Case To My Account. Before you can proceed with adding a case you must have created an account using the Registration process accessed through Case.net, Manage My Case. If you do not already have an account you will be prompted to create an account.
For more information about creating an account and registration, see Manage My Case - Getting Started under the Help dropdown menu.
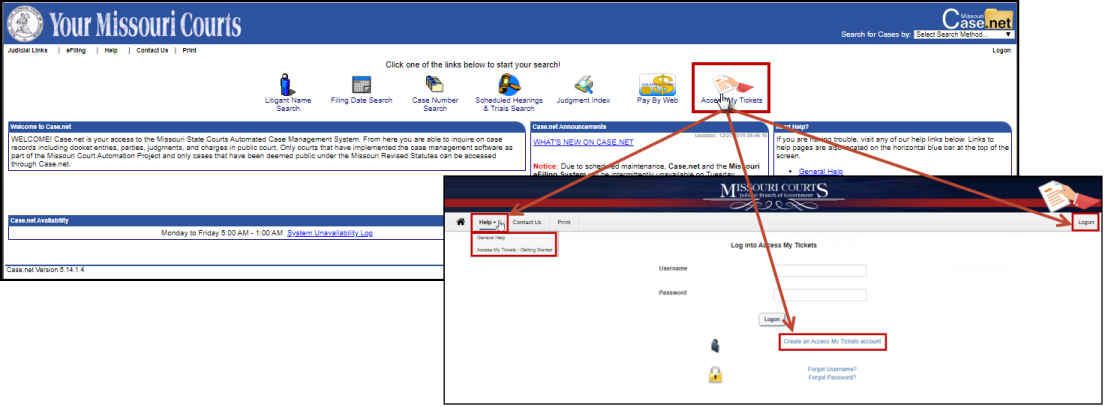
To Logon, Create an MMC account or for Help, click the Manage My Case link on the Missouri Courts Home page.
Once you have successfully logged on, the Manage My Case Home page will display.
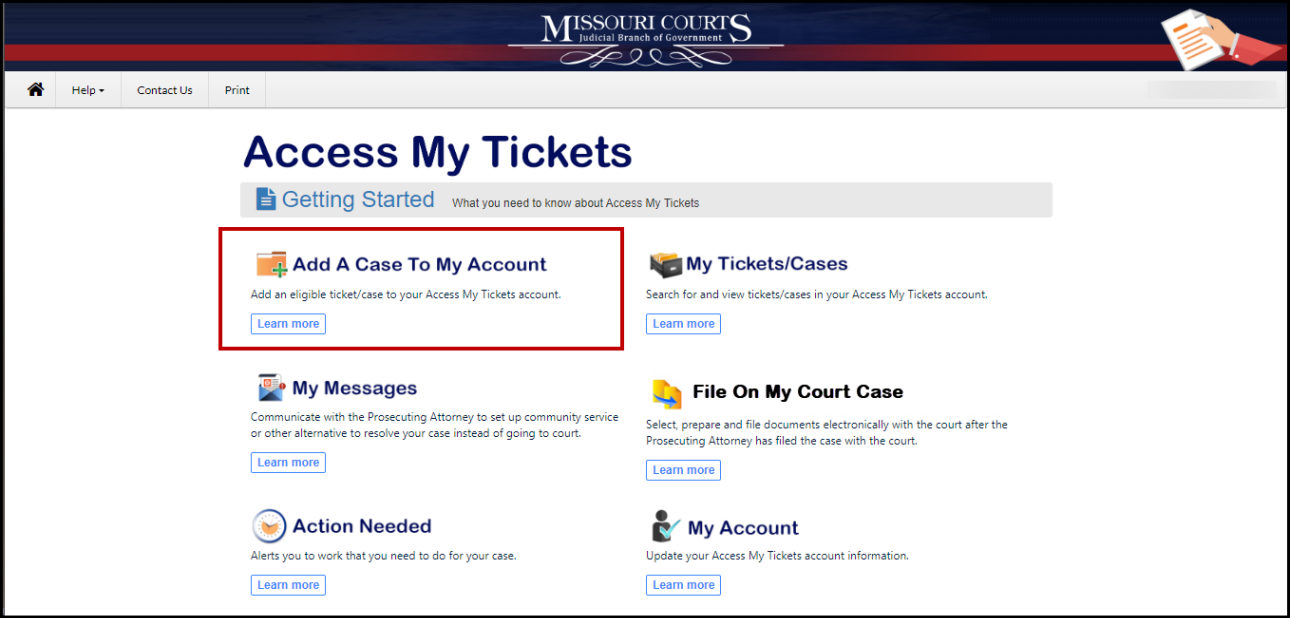
MMC Home Page
Click the Add A Case To My Account link.
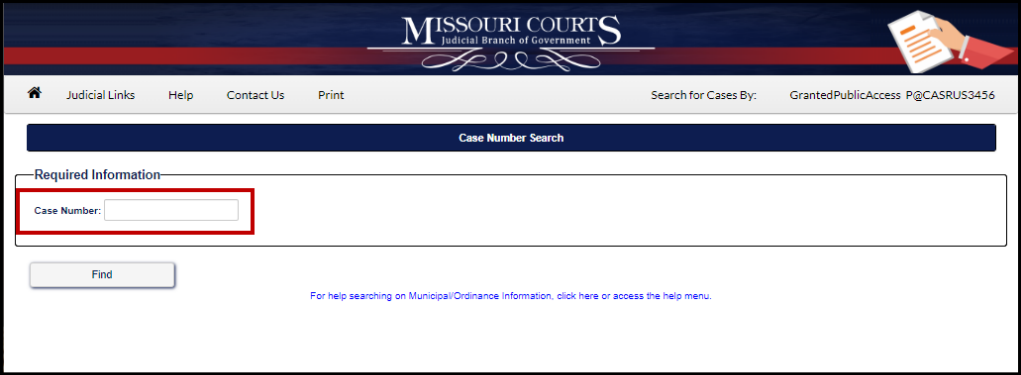
You will need your ticket for verification that this is your ticket. Enter the ticket number in the Case Number field. Click Find.
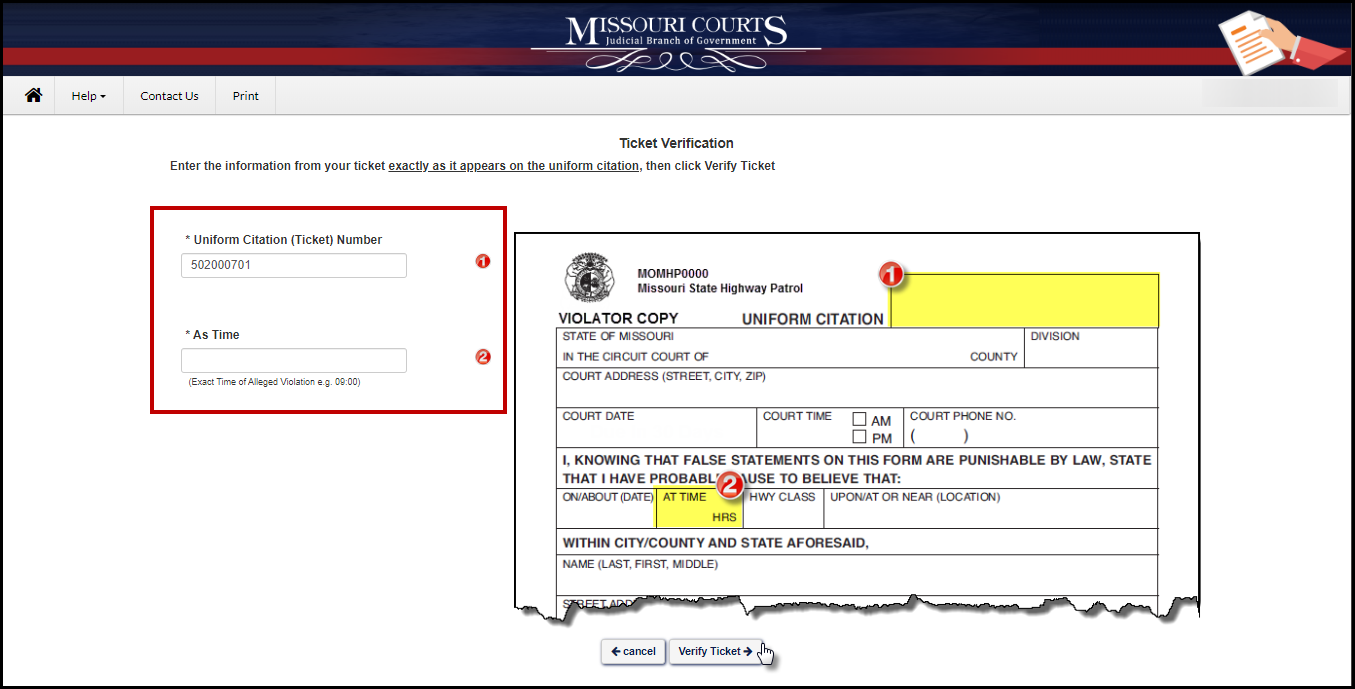
Enter the Time the ticket was issued. The time can be found on the ticket (see #2 below).
When the time has been entered, click Verify Ticket to proceed or click Cancel to return to the Manage My Case Home page.
When Verify Ticket is clicked, the Ticket Verification page will open. Review and confirm the information is correct. In the Know Your Rights section, review and click each box to acknowledge you have read your rights. ALL of the boxes must be selected before you can proceed to the next step.
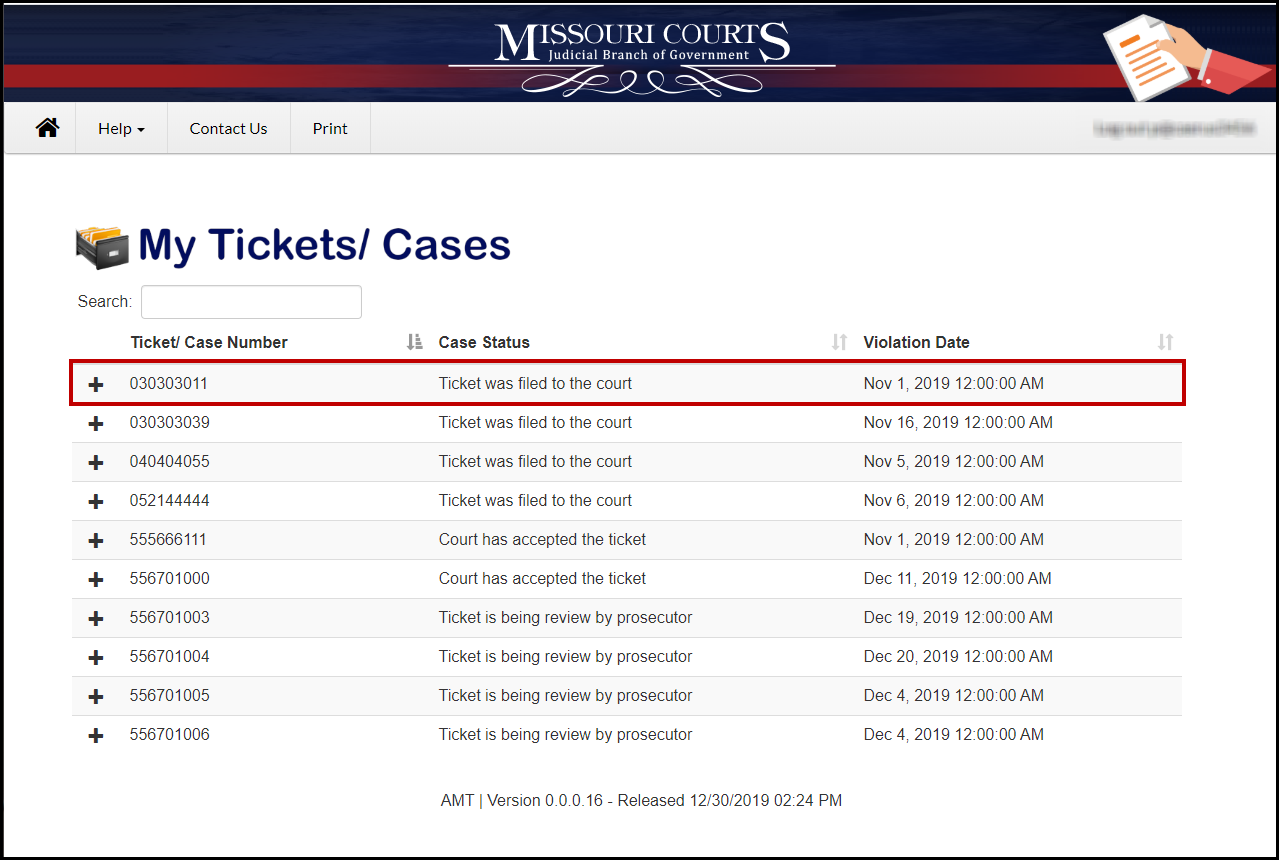
After all of the boxes in the These are your Rights section have been clicked, AND the I am representing myself box has been clicked, the Add to My Account button will become active. Click Add to My Account. Selecting Back will return you to the Ticket Verification Home page. Clicking Add to My Account will add the selected case and open the My Tickets/Cases page. Any case entered will display showing the Ticket/Case Number, Case Status and Violation Date.
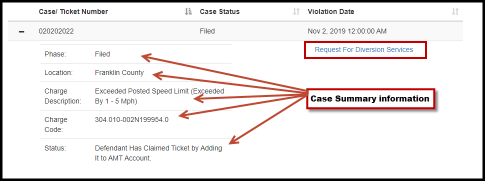
Click the + next to the
Ticket/Case Number to expand the ticket information.
Expanding the Ticket/Case Number will display case summary information.
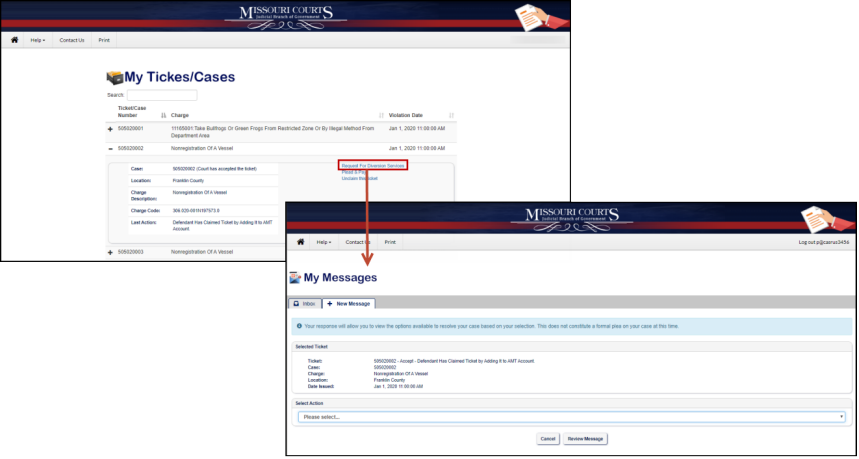
Click Request For Diversion Services to request other options to paying the fine.
To request diversion services, click the dropdown menu and select "I Would Like to Request Alternatives to Prosecution."
The message will expand and display options available that are an alternative to prosecution. Click the radio button next to the preferred option or in the box marked Other, and enter an alternative to the options displayed.
Enter any additional comments in the Comments field. If any documentation is to be attached, use the Upload Document section to add it to the message and select Yes. If there is no documentation, this step can be skipped.
Click Review Message.
Review the message. Click Send to send the message to the Prosecuting Attorney. Click Cancel to return to the Manage My Case Home page.
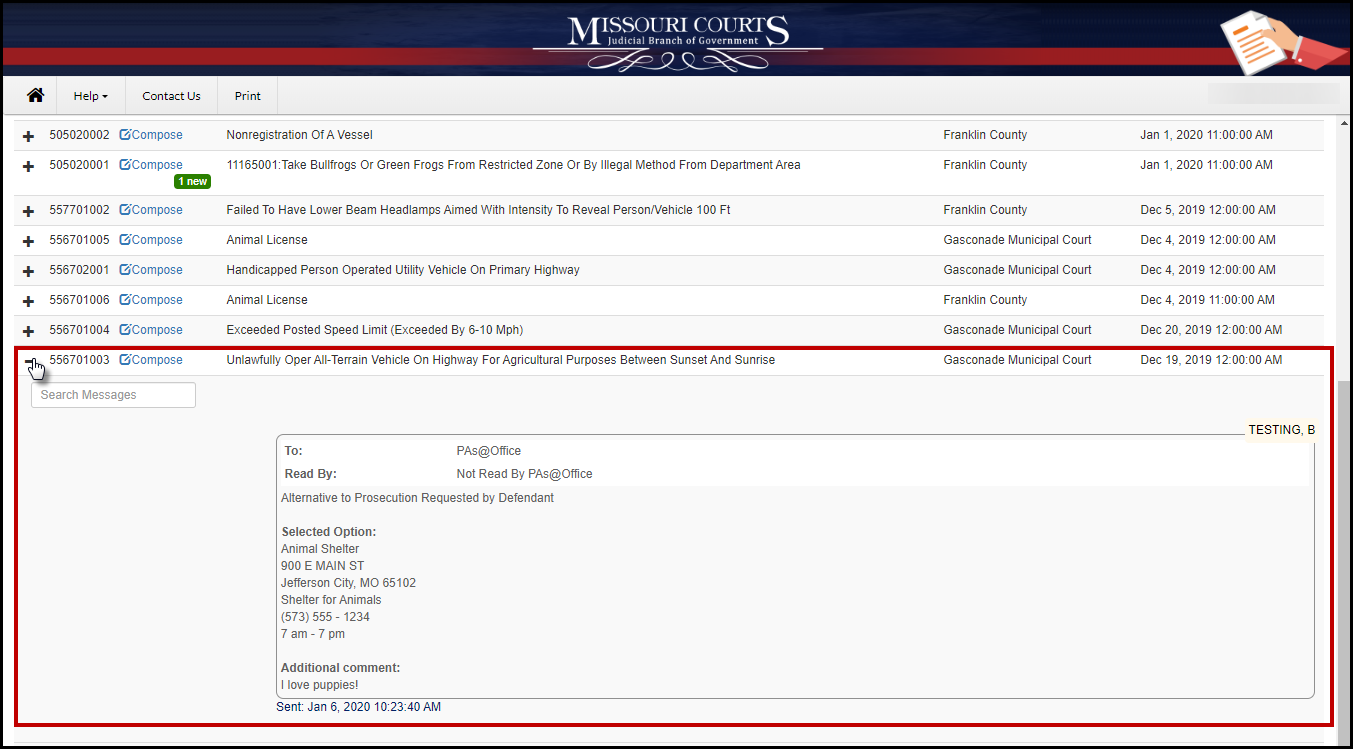
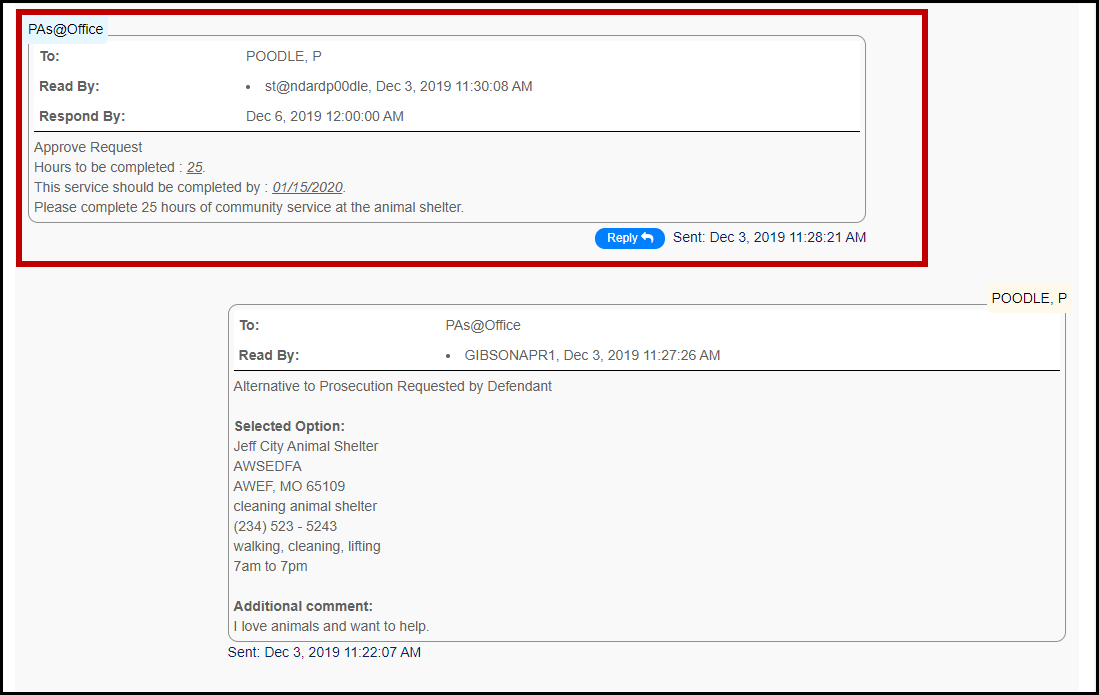
Any message sent or received can be viewed in My Messages. Click the + to expand the case information and review any messages.
New messages will display in a green box in the Ticket/Case section. To view new messages, click the + to display any new or pending messages.
Message will display in a string with the most recent message at the top. Any new message(s) will display with a reply option.
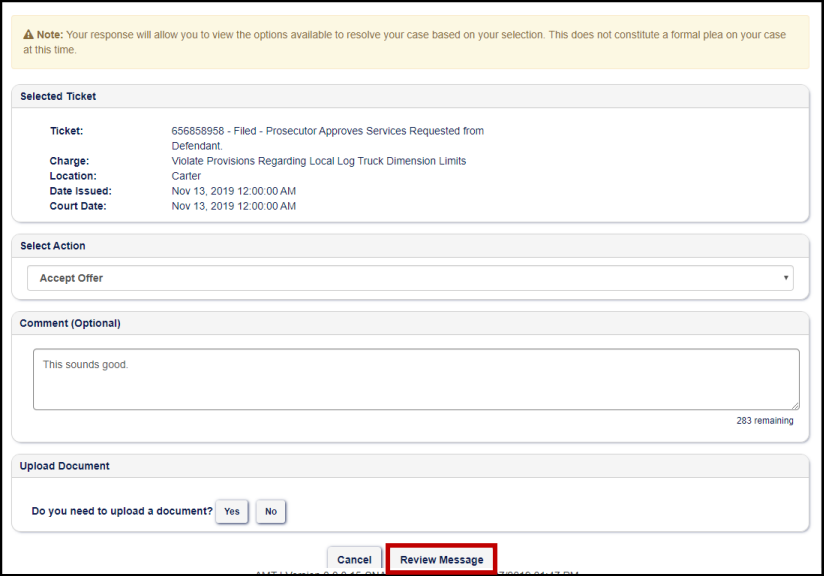
To reply to a message, click the Reply button and select in the Select Actions section one of the following actions:
- Counter Offer - Select to negotiate the number of hours and/or the time frame for completion.
- Accept Offer - This action accepts the offer of hours and time frame of the diversion services offered by the Prosecuting Attorney.
- Withdraw Alternative Request - This action indicates that any proposed diversion service is being withdrawn and NO diversion service is being requested.
Select Review Message.
Select Action and Review Message.
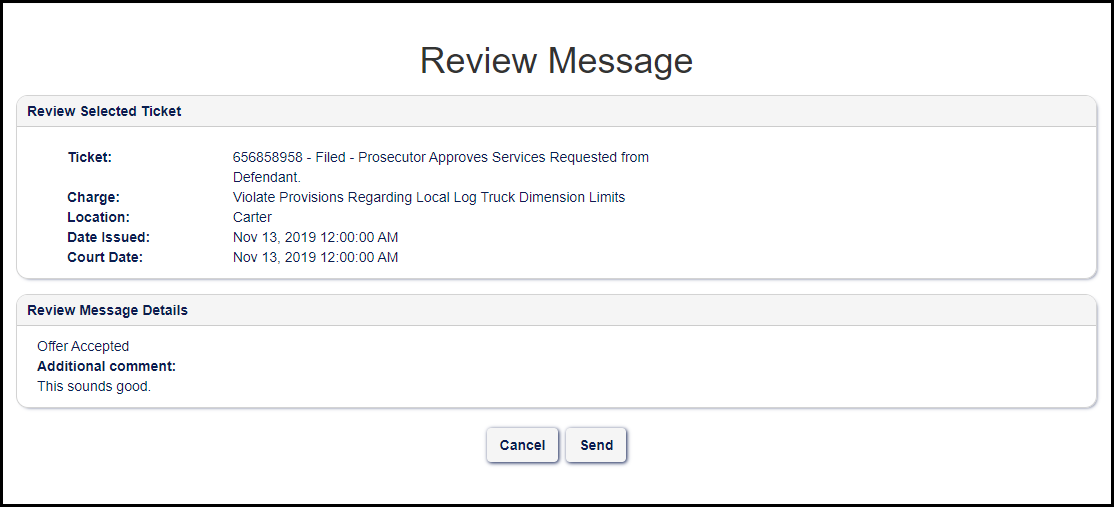
Confirm that the information in the message is correct.
Click Send to send the message to the Prosecuting Attorney.
Click Cancel to return to the My Messages inbox.
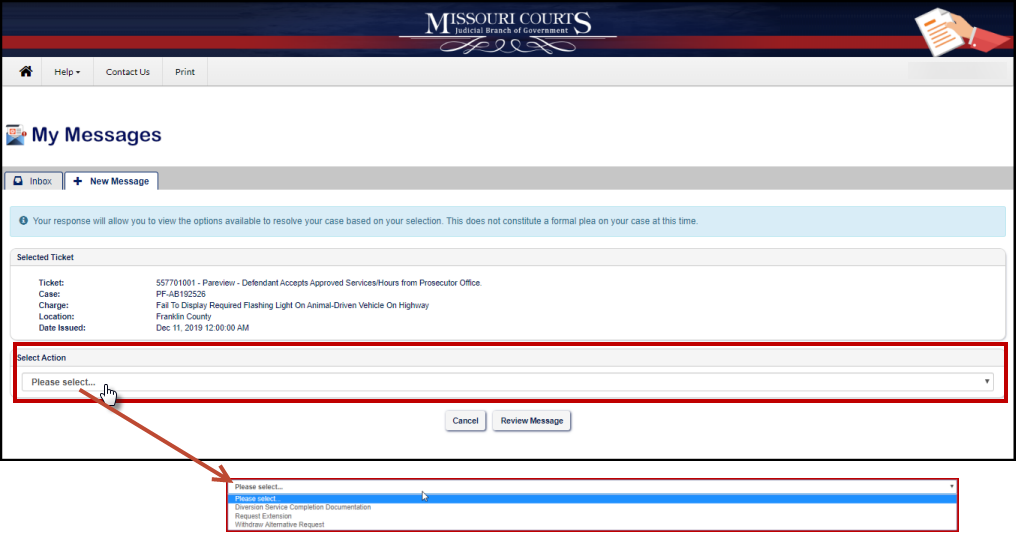
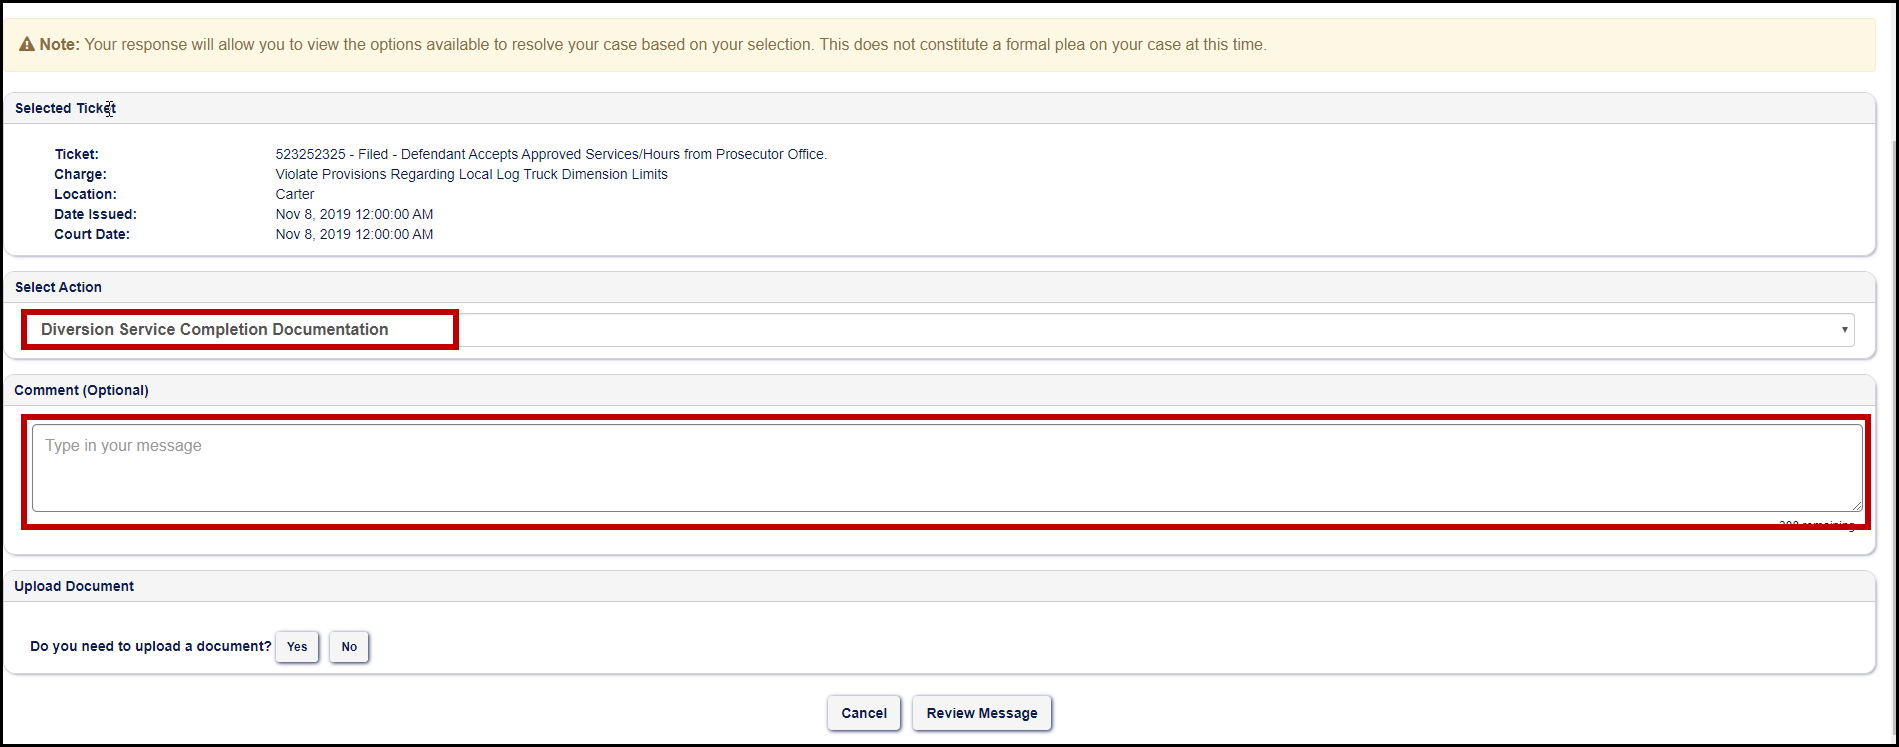
When the diversion service activity has been completed, go to the My Messages inbox and click Compose in the Ticket/Case Number field next to the ticket number.
Select in the Select Action section:
- Diversion Service Completion Documentation - When this is selected, attach the completed documentation in the Upload Document section and click Review Message. Add any comments in the Comments section.
- Request Extension - In the Comments sections, add any information regarding the reason for the request for extension and click Review Message to continue.
- Withdraw Alternative Request - This action indicates that any diversion service that was agreed upon is being withdrawn. Add any comments or additional information in the Comment section. Click Review Message to continue.
Click Review Message to continue.
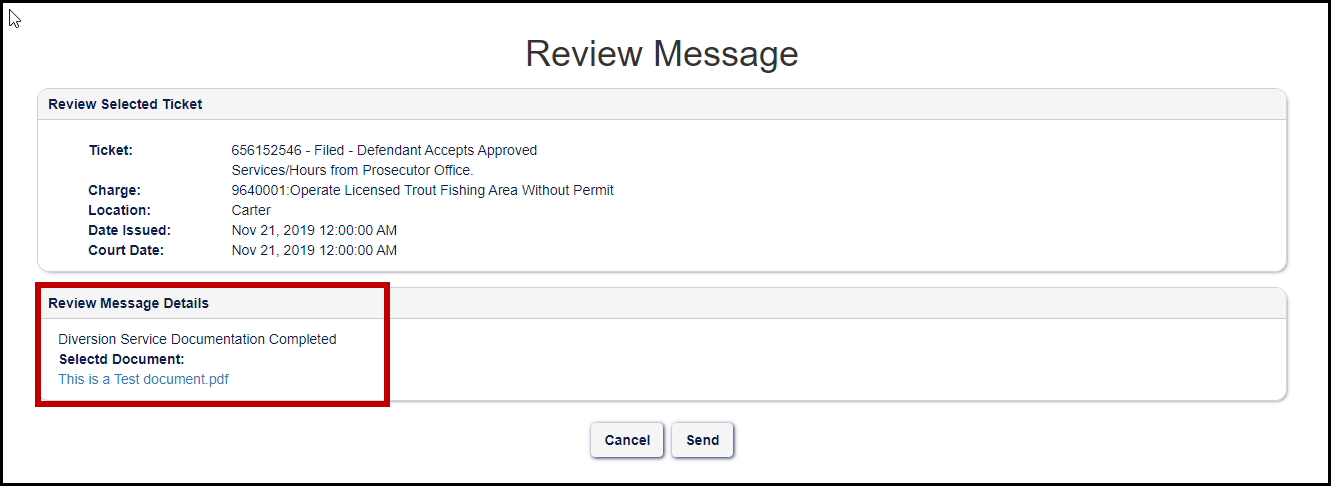
Note: If documentation is required, ensure that the attachment displays in the Review Message Details section.
Note: To upload a document see Upload My Document in File On My Court Case.
Click Send to send the message to the Prosecuting Attorney.
The Prosecuting Attorney will review any completion documentation.
A message will be sent indicating that the diversion service was completed successfully.
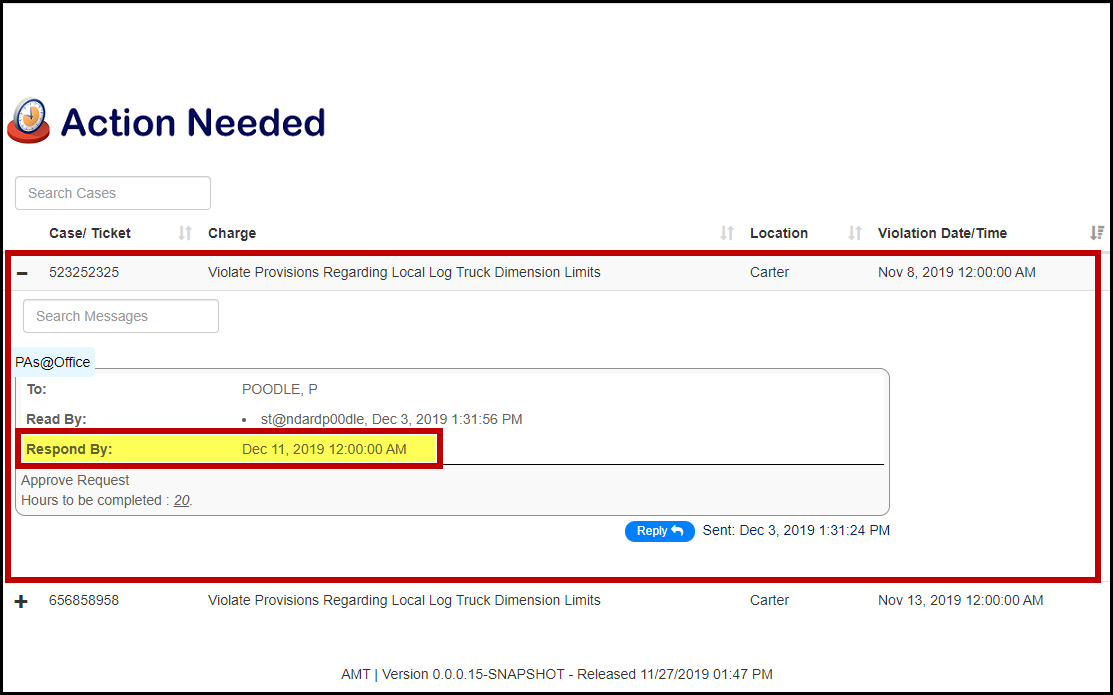
The
Action Needed section displays any pending tasks associated to any tickets/cases in
My Messages.
Click the Action Needed icon to open and view any pending tasks.
The Action Needed section will display any ticket/case information.
Click the + next to the ticket/case to review any pending action. The Respond By information indicates that a reply to a message is required.
When

is clicked, the message is opened in the
My Messages section and will display any message history.
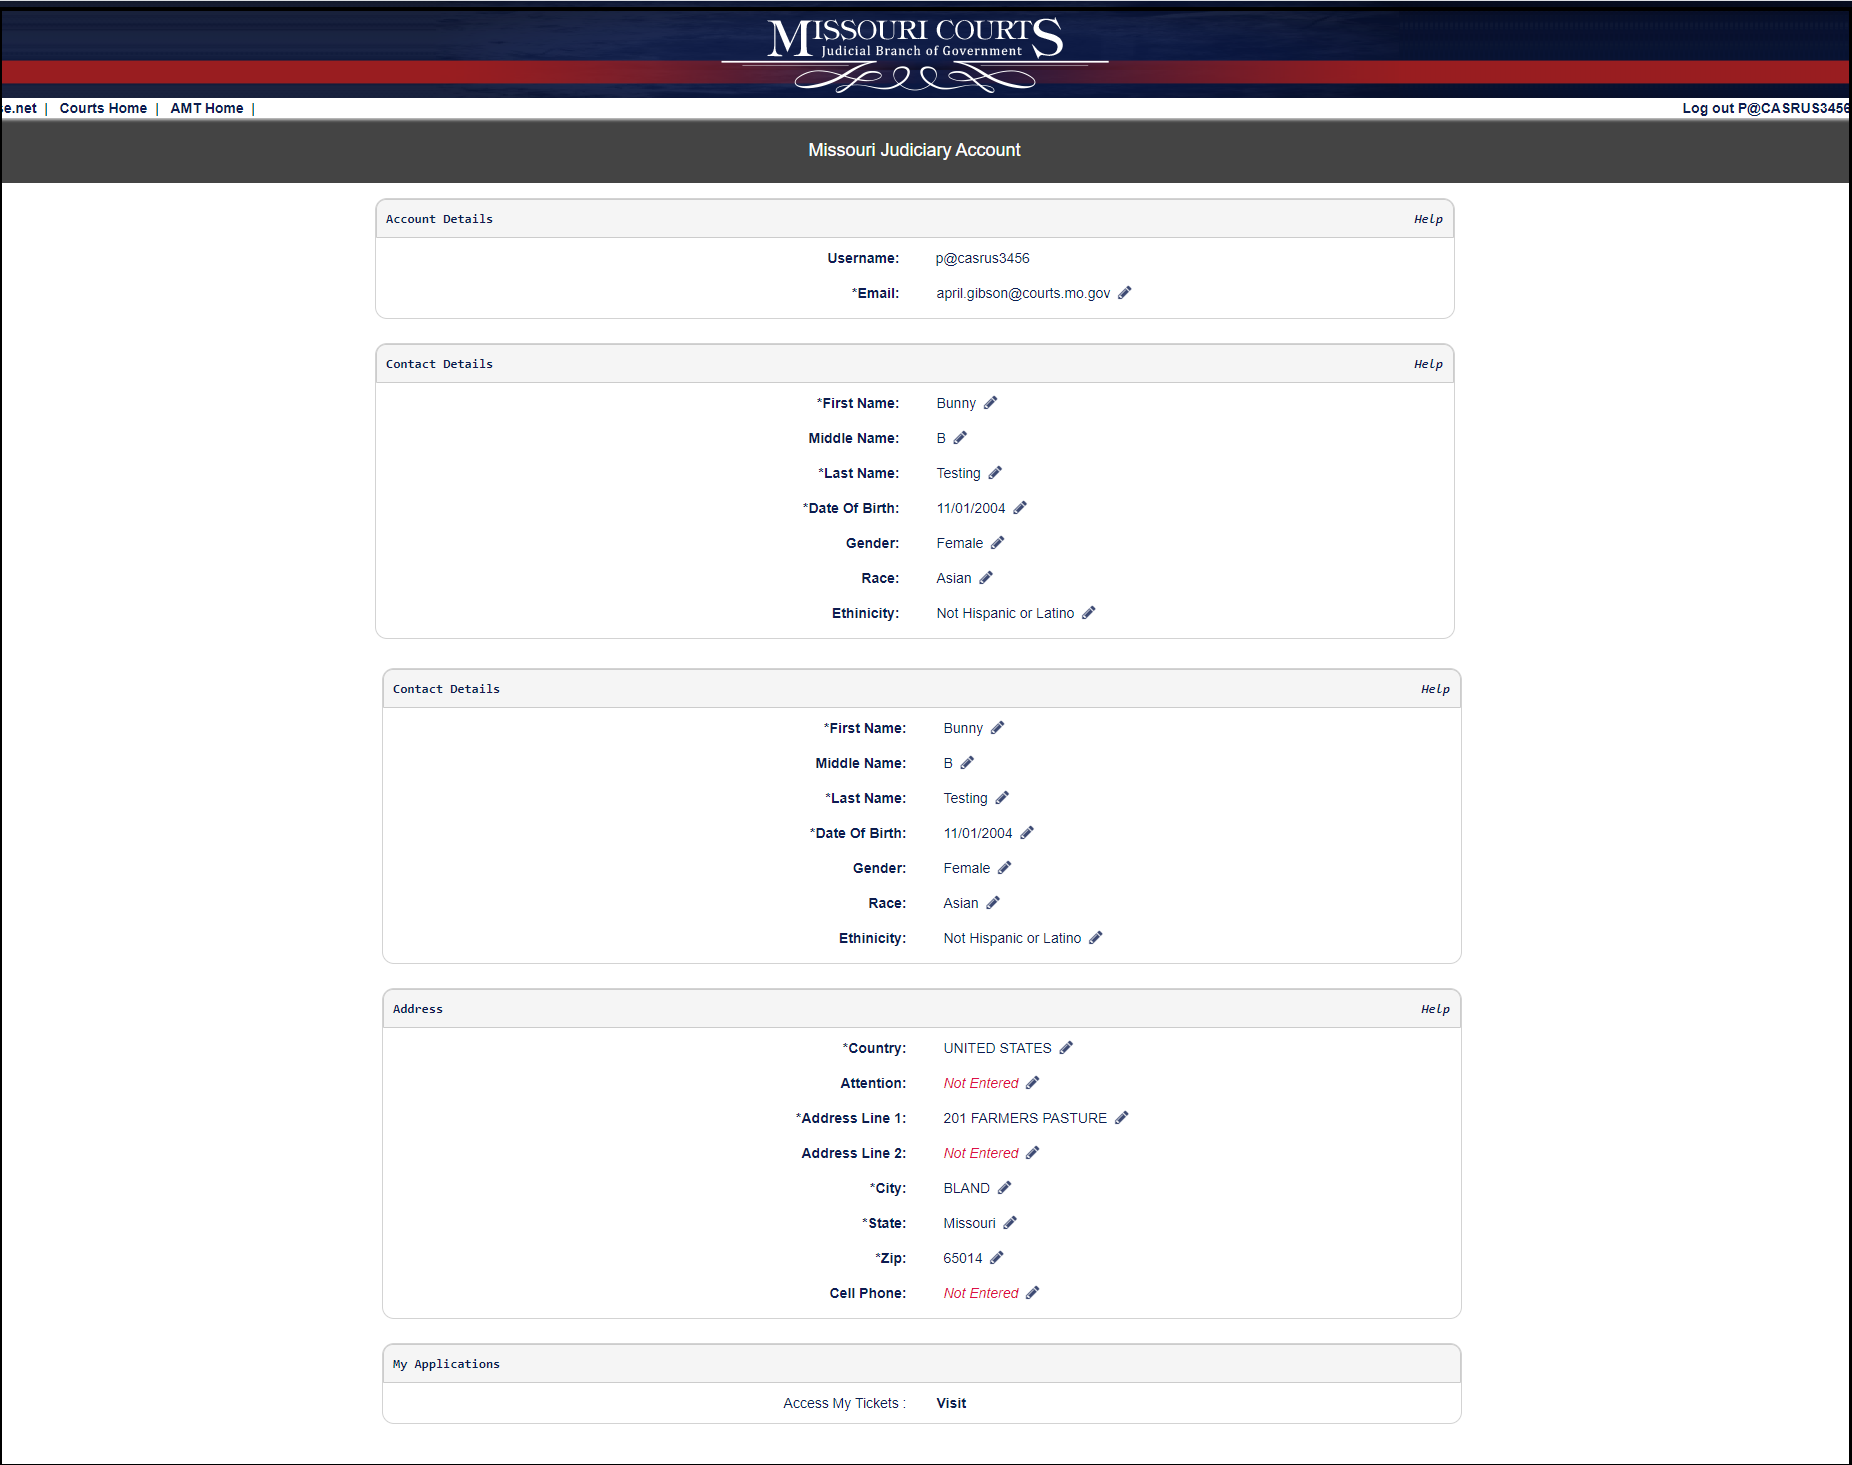
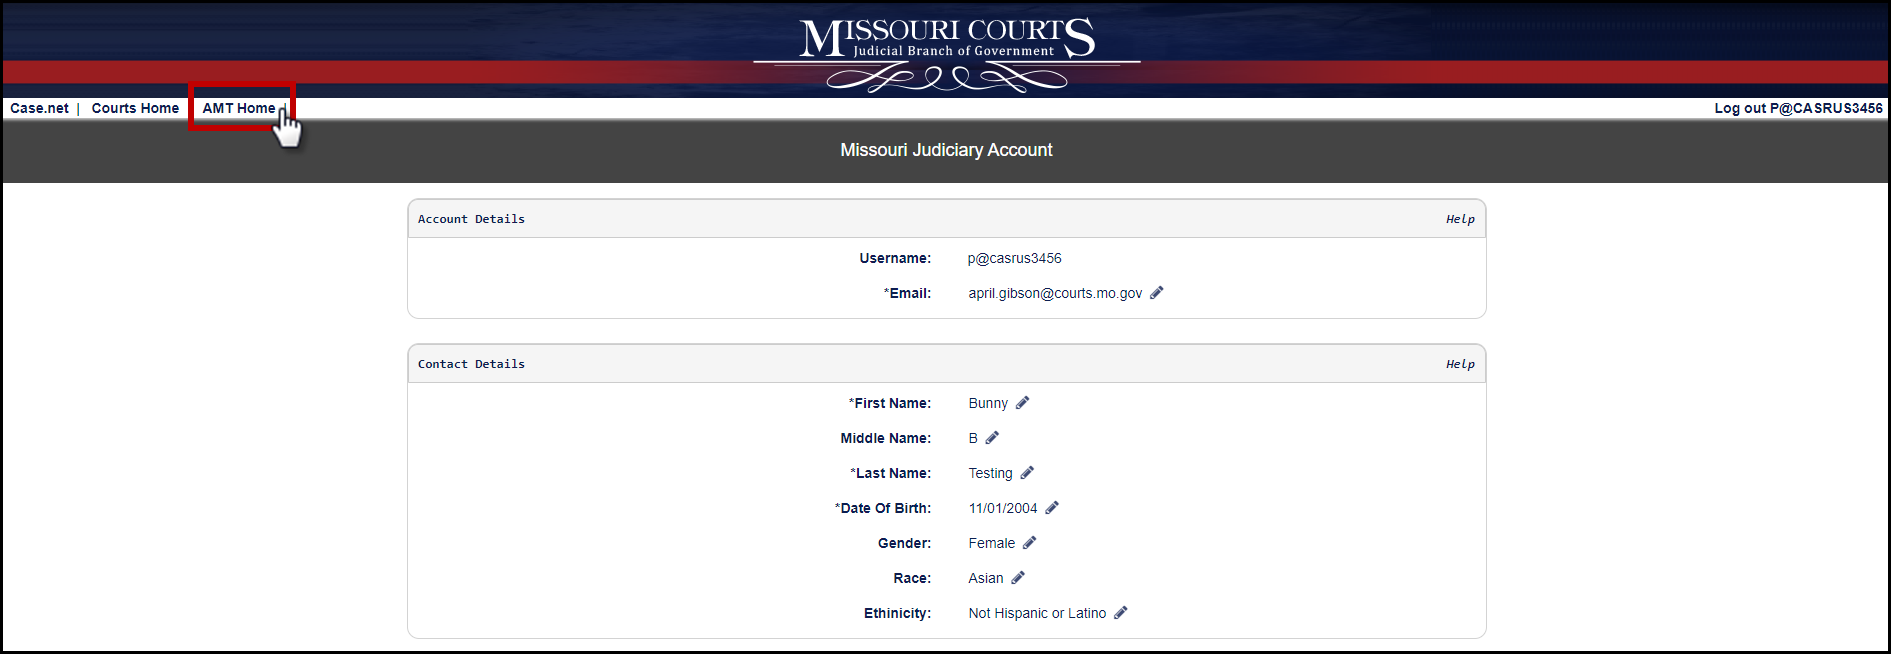
Welcome to the
My Account help information for Manage My Case. The
My Account section displays any information relating to the account created in Manage My Case.
To review and/or edit any account information, start by clicking the
My Account link on the Manage My Case Home page.
Sections for
Account Details,
Contact Details,
Address and
My Applications will display. Any information within each of these sections that can be updated will display a pencil icon

that when clicked, will open each item individually to allow for updates or changes.
If a line of information is eligible to be updated or edited, it will display the pencil icon
. When the pencil icon is clicked, the line of information will expand a text box that can be reviewed, edited or updated. Simply type any new information within the text box and click the

to save the information. If no information needs to be updated, click the

to close the edit box.
Click the MMC Home link to return to the Manage My Case Home page.